PICO-8
Nerdy
Hardware
hardware:
Floppy Disk Games
![]()
This tutorial will help you save PICO-8 games on physical Floppy Disks, not as backup storage (though that's one option), but as a way to play physical cartridges on a dedicated PICO-8 console such as this:

Prerequisites:
- USB Floppy Disk Drive
- Floppy Disks (used floppies may work, but not always)
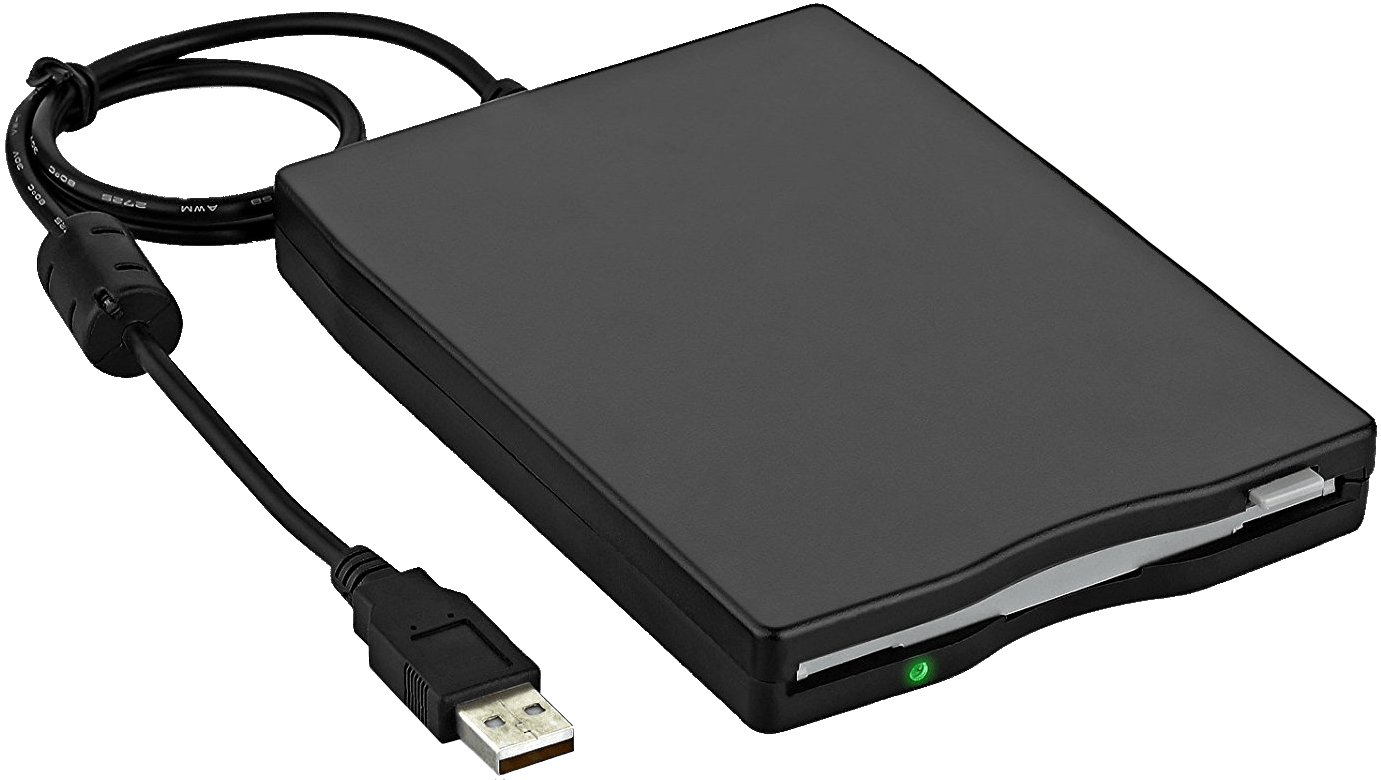
USB Floppy Disk Drive
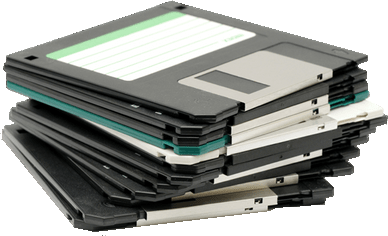
3.5" Floppy Disks
Note: This tutorial describes the process using Windows but it can be done on MacOS, Linux, etc. with small adjustments where appropriate.
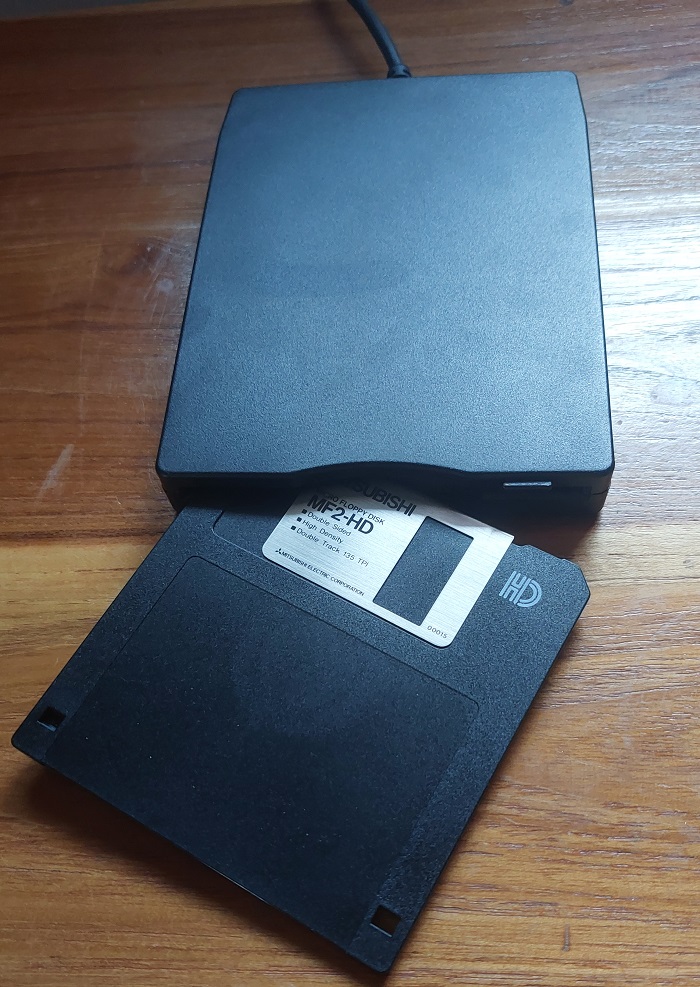
There are different types of Floppy Disks. The most common and the ones we use here are the smallest at 3.5 inches, and the most rigid and durable despite their name. They can usually hold 1,440 KB or 1.44 MB. A single full PICO-8 cart (.p8.png exported cartridge image) is about 60 KB so you have plenty of space to put individual games on each floppy, even multi-cart games (a single game on up to 16 cartridges, about 1 MB at full capacity).
1-1. Plug in the Drive.
Start by plugging in your Floppy Disk Drive into your computer. Do not be alarmed by loud noises coming from your drive but if these sounds do not settle down or if you hear high pitched beeps or screeching, that is not normal, try unplugging and plugging the drive back in. Sometimes the USB connection is imperfect and you may need to try adjusting the slight angle that it plugs in to get your drive working properly (welcome to the retro tech days of the 90's!).
1-2. Insert Floppy Disk.
Insert your floppy disk (new or used) into your disk drive. Again, you may hear loud noises as the drive attempts to read the floppy disk. Give it a bit of time and it should settle down but yours may continue making noise even as you move on to the next step.
1-3. Prepare to Format the Disk.
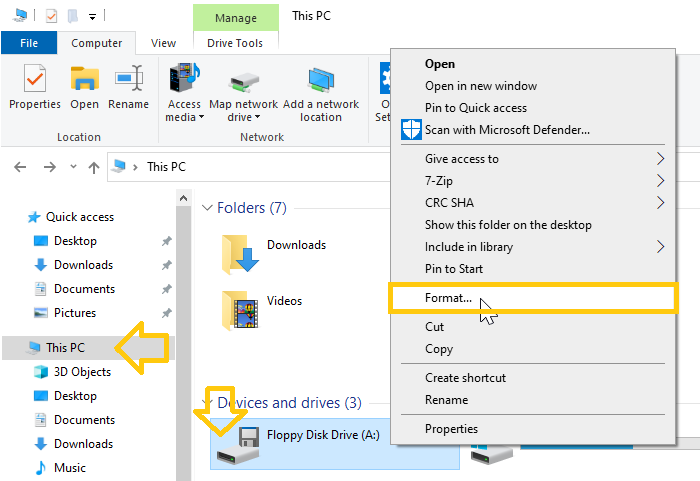
Navigate to you PC in a file explorer and if your floppy drive is being read and recognized by your computer then you should see an icon of a drive and a floppy disk named "Floppy Disk Drive (A:)". Right click on this icon and then left click "Format..." in the list of options.
By formatting, you will be erasing any and all data that was on this floppy disk, so be sure you don't need any old data. You can attempt to double click on the icon and if it reads well, you can copy the files to your computer to make a backup.
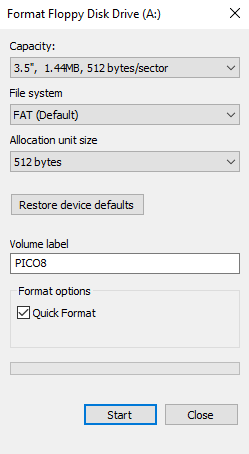
1-3. Format.
This window should popup. Make sure that the File system is set to "FAT" and you can label this disk anyway you'd like under "Volume Label". Check the "Quick Format" box and then click "Start".
Wait for the formatting to finish before moving on. This process makes sure that the Floppy Disk is completely blank and ready to be read from and written to with new data.
Possible Errors
| Error | Solution |
|---|---|
| Invalid media or Track 0 Bad | Unfortunately, this floppy disk has been corrupted. It may have been exposed to too much heat, moisture, or magnets at some point and it is now unusable. But don't worry! There are plenty of cool DIY projects you can do with a bad floppy. However, for this project, you'll want to set this floppy aside, label it as bad, and try formatting another one. |
| Write Protect Error | This has a simple solution! Floppy Disks come with a physical locking system to make them read-only. Eject your floppy disk and look closely at the corners. You should see one or two square holes. One of these holes is the Write Protection Lock and may not be covered up by a small sliding plastic cap. You should be able to unlock by sliding this cap using a fingernail to close the hole.  With your floppy disk now unlocked, insert it back into the drive and try formatting again. With your floppy disk now unlocked, insert it back into the drive and try formatting again. |
| Other | Sometimes your Windows will not allow formatting of the disk in drive (A:). In this case, you can attempt to format it through a terminal or command prompt instead. To do this, click Start button and type in "cmd". Open the Commant Prompt App. Type in "format a: /q" (without quotes) to quick format the floppy and press enter. |
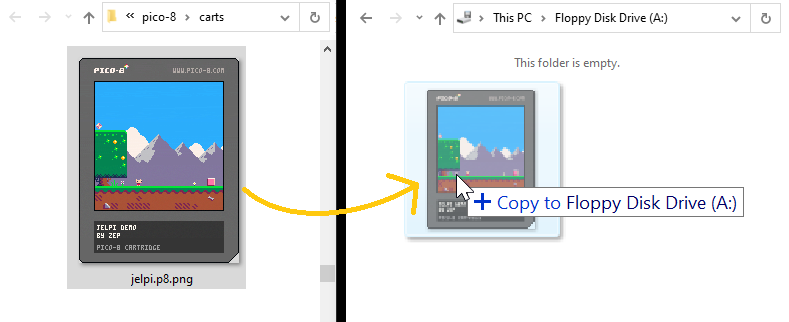
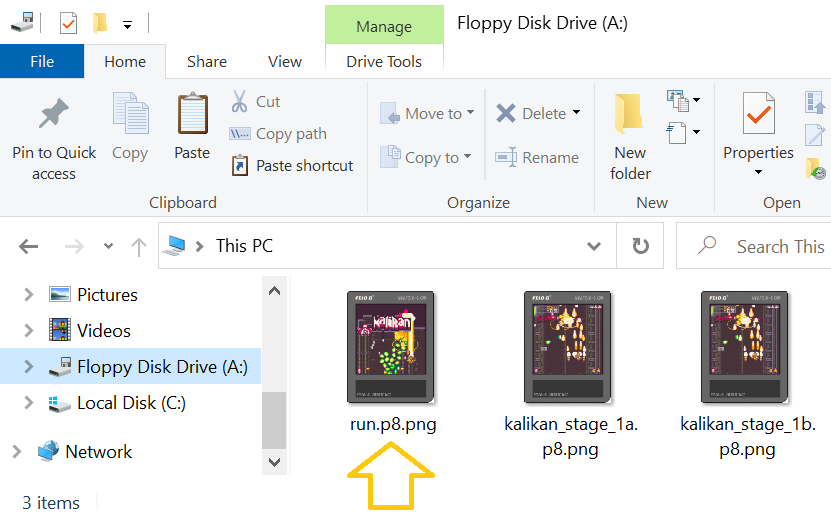
Now that your floppy disk is formatted and ready to be written to, navigate back to the Floppy Disk Drive (A:) in your file explorer and double click on it. This should access the floppy disk within the drive and open as an empty folder.
2-1. Move Game File.
Copy and paste (or drag and drop) the .p8.png game cart file directly to the floppy disk folder.
2-2. Wait for Process Complete.
The writing process of a Floppy Disk Dive is also very noisy and much slower than modern tech, so give it some time and do not disturb the drive.
An error may occur during this step, so see the end of the previous section about formatting the disk to try to solve it.

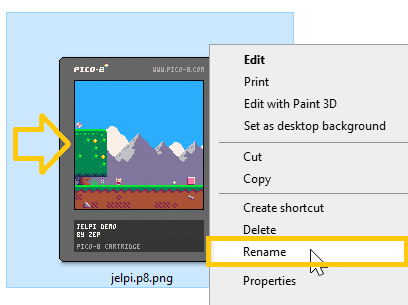
2-3. Rename the File.
If all goes smoothly, then you should now see the file inside the Floppy Disk folder. Right click on the icon and click "Rename" in the options.
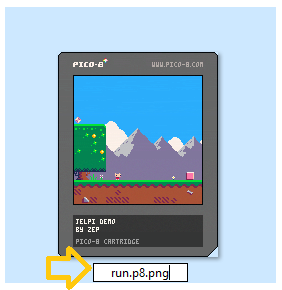
2-4. Ready for Auto-load Console.
If you are following the Floppy Disk PICO-8 Console tutorial, then you will want to rename this game file to "run.p8.png" so that your console can automatically find and run the game.
You can name it whatever you'd like but just make sure to keep it consistent so that your bootup program will recognize every floppy disk cartridge you add a game to.
Congrats! Your floppy disk PICO-8 game is now ready to be tested in your console!
* Multi-cart games (a single game on up to 16 PICO-8 carts) are saved as seprate multiple cartridge files, as the name suggests. While one cart file is loaded and running, it can load another file and even share information between these carts. When it does this, you will see a small rotating cartridge in the upper left corner of PICO-8. If you see this while playing a game, it means it is a multi-cart game!
These games will take a bit extra work to get them working properly as physical cartridges on our floppy disks.
3-1. Download Multicarts on Splore.
Multicarts aren't as simple to download from the BBS as single carts. Some developers offer all the carts on itch.io pages, or github, so you can check there for an easy bundled download. Some developers are happy to give you the files if you request them so if all else fails, then try sending them a friendly message.
Luckily, we can try using SPLORE to help us download all the extra carts we need to play the game. So open PICO-8, type in "splore", press enter, and search for the game you want. This method also works for single-cart games by the way, so you can just hang out in splore and collect all your favorites up.
Once you find the game you want, click on it to run and play through it at least once to try to load all necessary sub-carts. (Sometimes easier said than done! See below.)

Important
Some multicart games are simply broken up by a menu cart and then the game cart (Into Ruins for example) so you can simply play the actual game once, even for just a second, and you will have both carts downloaded.
However, some multicart games are broken up by levels, where each level is on a separate cart. So to get all the carts downloaded, you will have to actually play and at least reach the final level. (Kalikan and Poom for example).
Here are some other options:
1. Check if the developer has already bundled the multicart files in a downloadable zip either on an itch page or a github page. Start by opening the BBS game page and look for links in the description.
2. If you are familiar enough with code, you can view the game code of the main cart, then search for "load" and find the name of the cart that it links to. It would look like load("#game_name-1") for example, and you can ignore the version numbers at the end of the name. Manually load that cart in PICO-8 with the command "load #game_name" and repeat for each subsequent cart.
3. Politely explain what you want them for and request the multicart files directly from the game developers. Start by looking them up on the BBS, where they usually have links to their other social media hubs that may allow direct messages. Please do this as a last resort as I would hate to see devs being bombarded with game file requests. Hopefully more devs will post links to download the multicart files somewhere obvious so they are easy to find.
(If you do one of these other options, then open the folder containing the game files and skip to step 3-4 below.)
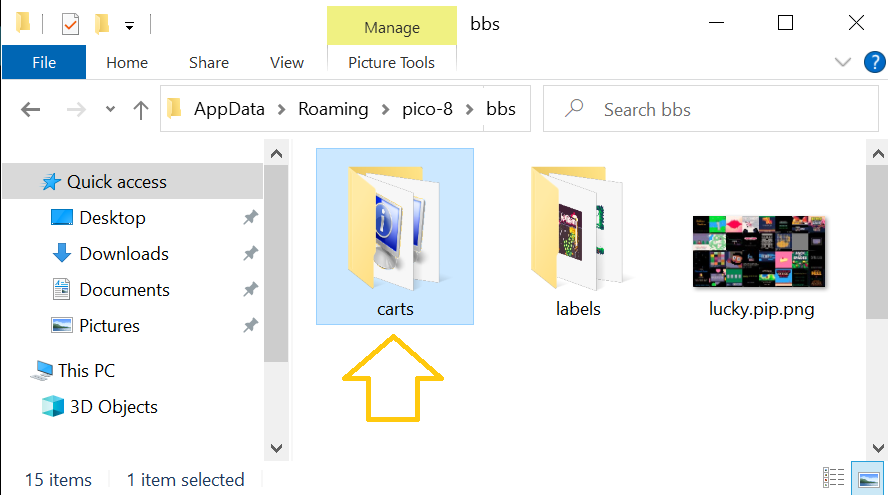
3-2. Find Games Stored Locally.
When you play games through SPLORE, these games are actually stored locally in a separate carts folder.
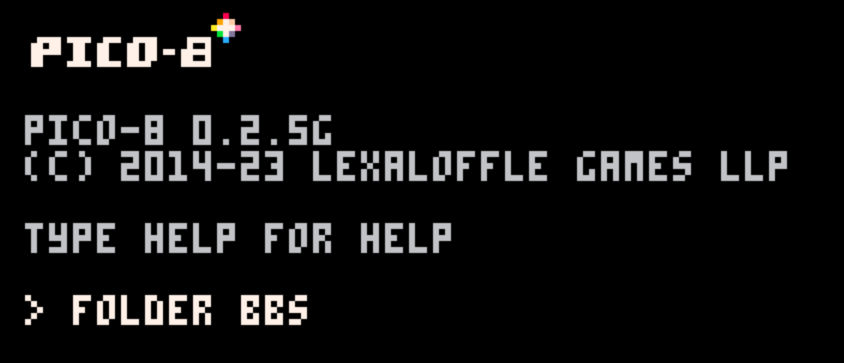
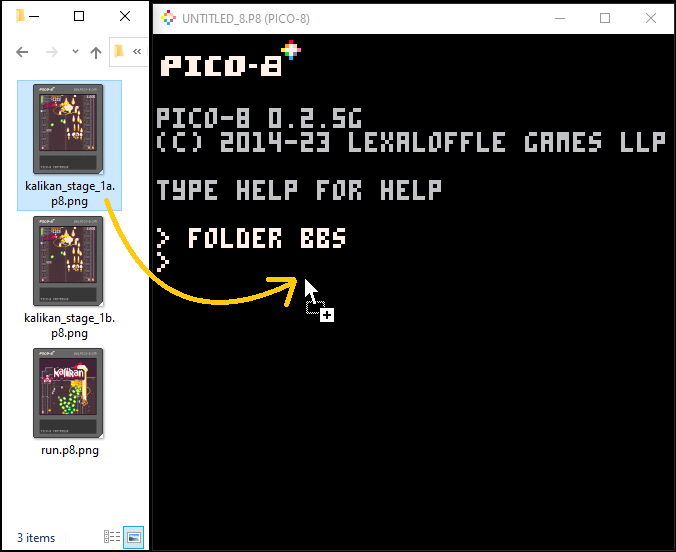
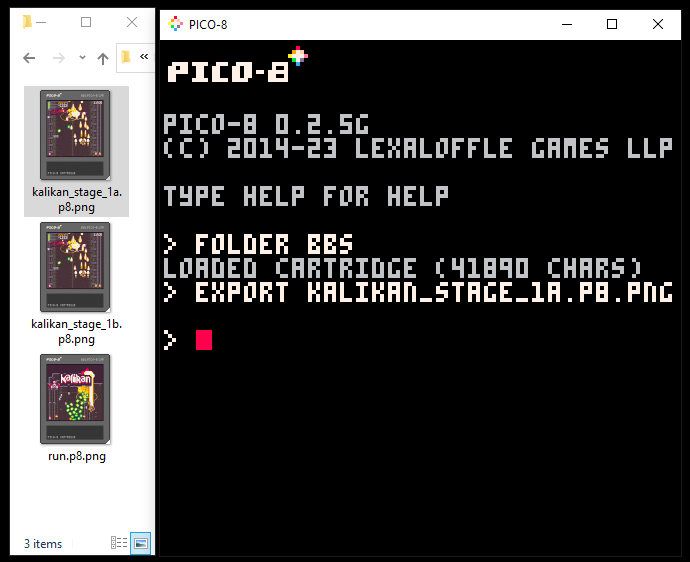
The easiest way to access them is to open PICO-8 and type "folder bbs" and press enter.
3-3. Open BBS/Carts Folder
You can also access this folder by typing "%appdata%" in your start menu, press enter, and then navigate to Roaming > pico-8 > bbs > carts folder.
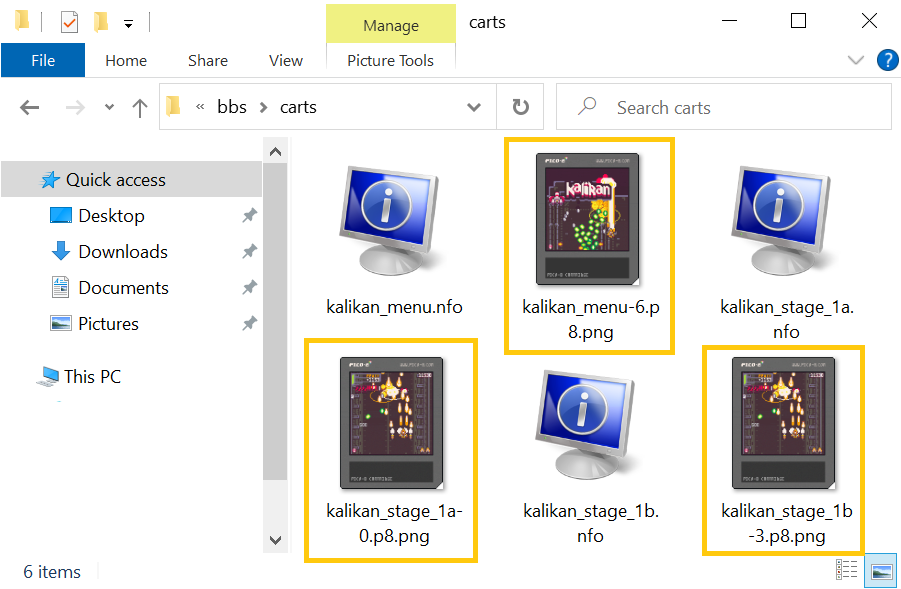
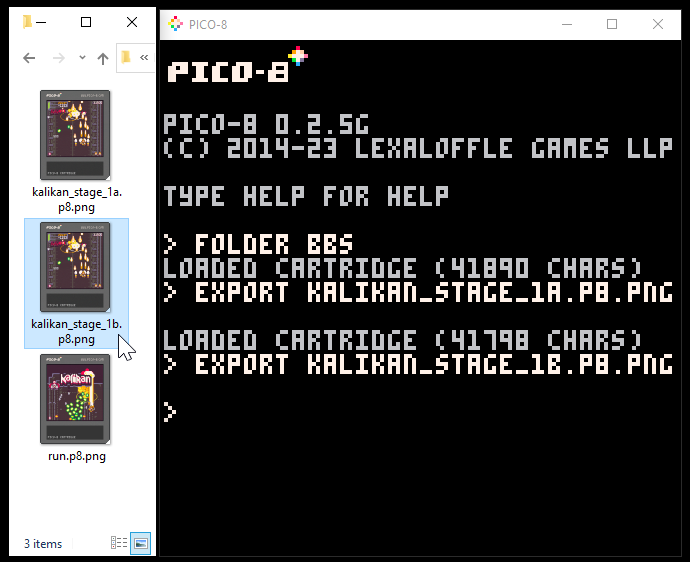
3-4. Find the Game Files.
Hopefully you were able to find and download all of the required multicarts of your game. You can ignore the .info files and focus on the .p8.png files.
Copy and Paste these files in a new folder to edit them before moving them to your formatted floppy disk.
3-5. Rename the Main Game File.
Find which file is the original cart that gets loaded. If you can't tell based on the name, go to the BBS page of the game and look at the #game_name under the player. That should be the name of the main game file.
* Copy this cart's file name or just remember this for later steps. *
Rename this file run.p8.png or whatever filename you are using to autorun your physical cartridges.
3-6. Load the Multicarts in PICO-8
Since these are image files, you won't be able to simply access the game code from a text editor. Instead, we will access the code by loading the cart image in PICO-8.
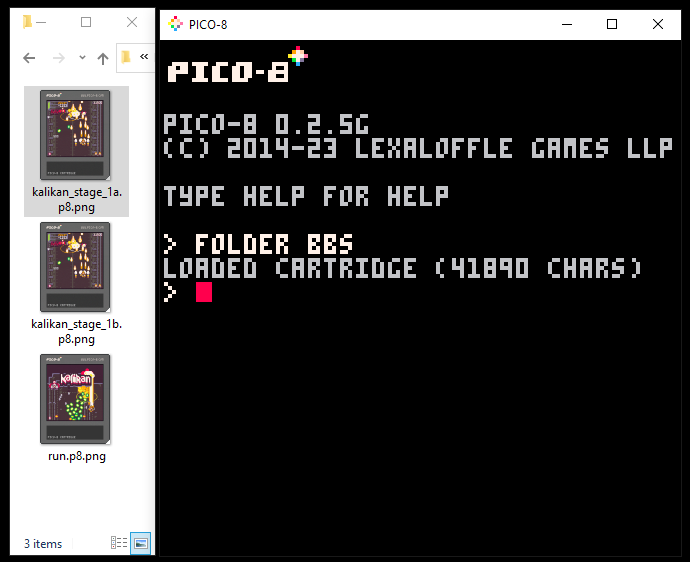
Drag and Drop the cart file into the PICO-8 command screen.
3-1. View the Code.
After dropping the file onto PICO-8, it should confirm with a "loaded cartridge" message.
Press Esc to view the code editor.
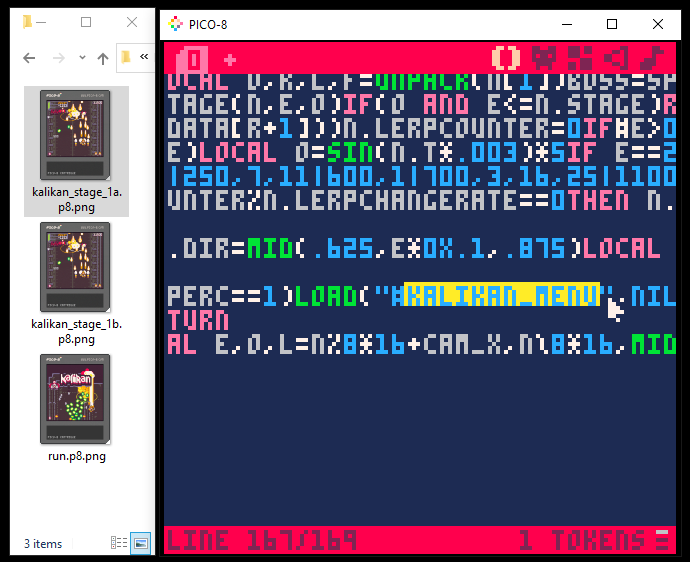
3-8. Search for Main Cart Filename.
Press Ctrl+F to open the search input at the top of the code editor. Then paste or type in the main cart's old name before you renamed it in step 3-5.
Press Enter to perform the search.

3-9. Find Load( Main Cart ).
You should be brought to the line we want to change. You will see load("# just before the file name you searched for.
If not, you can press Ctrl+G to search for the next instance of the same word(s) in the file.
If there are multiple tabs of code, then you will have to search each tab individually.
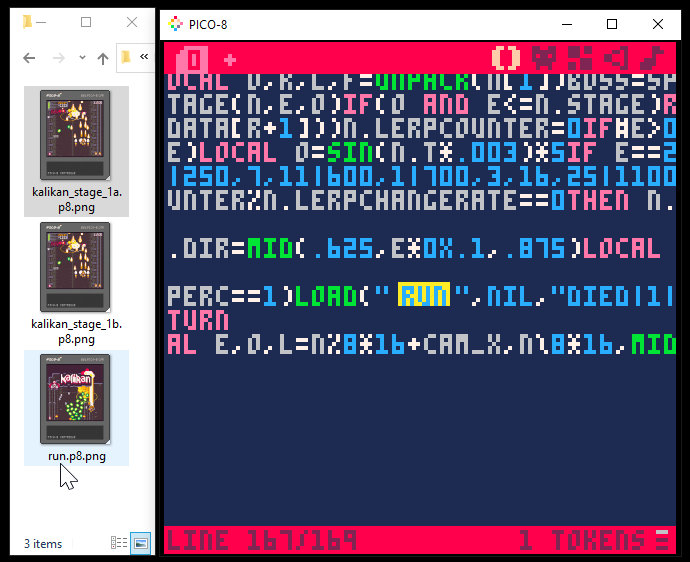
3-10. Change Load Filename Code.
Erase the old filename, including the # symbol, and rename it run or the new filename you chose.
This will allow the secondary-carts to find and load the main cart properly while running the game.
3-11. Export Updated Cart.
Save these changes to a new file by using the export command. Or overwrite the file you used by using the save command.
3-12. Repeat.
You will want to repeat steps 3-6 to 3-11 for each secondary cart so that they all can find and load the appropriate files.
When you are all done, move the primary and secondary carts all to your formatted Floppy Disk. Do not place them inside of any sub-folders. A bit of a hassle, but when you get to hold your favorite multicart PICO-8 games on physical cartridges, you'll smile and say it was worth it!
![]()

11698
21 Oct 2023