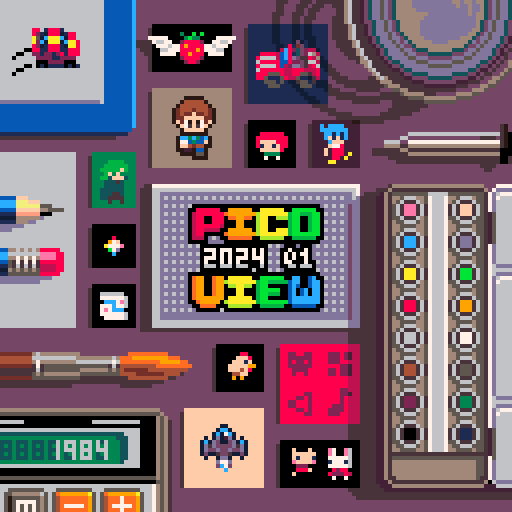
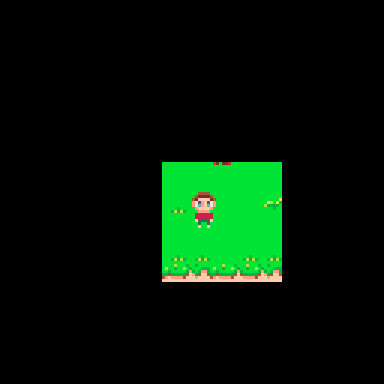
PICO-8
Pico-view
pico-view:
2024 Quarter 1
Hello Pico-View Reader, this 2024 Quarter 1 issue is the 13th in the series. This year we have taken a necessary break from the month-to-month grind of 2023, and thanks to the support on Ko-Fi, Pico-View will continue about every 3 months which is perfect for a quarterly zine. So instead of a monthly recap, this issue will catch you up on what you might have missed from January, February, and March 2024.
Thank you to the writers, contributors, and all supporters, that includes you reader! We thank you from the bottom of our hearts. And with that, have fun adventuring through the pixels and paragraphs of this issue of the Pico-View web-zine!
Authors & Contributors:
Retronator, Packbat, Bikibird, Luchak, Jack Raymond, SmartAlloc, Werxzy, KumaKhan22, LokiStriker, Achie, and Nerdy Teachers
Zine Supporters (Memberships):
drpaneas, SDotComics, dcolson, Tréveron, discorectangle, bikibird, Tubman, Johan Peitz, RB, sourencho, user1366, Johannes, kozm0naut, monoRAIL, icegoat, hiyaa, yoko, Xrqton, Traxxasislife, Noh, psicolabile, ridgeK
 Become a Supporter
Contents:
-Cover Art by Retronator
-Game Dev Extras - NerdyTeachers
-Free Music Jam - Packbat & Bikibird
-New Community Stars - NerdyTeachers
-PICO-8 Update 0.2.6
-Drawing Inverted Shapes - Nerdy Teachers
-Waveform Instruments - luchak
-Wave Designer - luchak
-Level Edit and Load - Jack Raymond (Gravitoid)
-Rapid Reviews - New Release Recommendations
-Featured Game Review: Oblivion Eve - Achie
-Oblivion Eve’s Map Transition Animations - SmartAlloc
-PICO-8 Custom Editors - Werxzy
-Orb of Aeternum: New Strategy Game Review - Nerdy Teachers
-A Brief History of War Gaming - KumaKhan22
-3k Shmup Day - Achie, Lokistriker, Werxzy
-Picotron 0.1 - Nerdy Teachers
-Pixel Art Gallery - Retronator
----------------------------------------------
-Closing Remarks
Game Dev Extras
by Nerdy Teachers
Pico-View is back! After last year I must admit I was beyond burnt out, but strangely at the same time very motivated. We had so many amazing articles last year providing us with tips, tricks, tutorials, insights, and approaches to all of the many sides of game development. While editing, I too was learning so much alongside you readers. So I was very tired, but also inspired to put all those lessons to good use in my next game, so in January I began making Puzzles of the Paladin.
I had a few goals in mind:
1. Have fun creating!
2. Put all my skills and knowledge into one project and test my own abilities.
3. Make it good enough to get featured on the BBS. (a goal we all seek I'm sure)
4. Take the project as far as possible using my other hobbies and skills to create even more.
Well I definitely had fun making the game itself; check. I was pleasantly surprised at both how much new knowledge I was able to apply and at the quality of the result; check. Then thanks to many of you for playing and giving the game a star and Zep's final approval, the game is now featured; check, fist pump, raise your glasses, cheers!
All of this kept my motivation high and pushed me to keep taking the fourth goal further and further. Now I can finally present to you all the fruits of those extra creative endeavors!
All physical "Game Dev Extras" in a single picture.
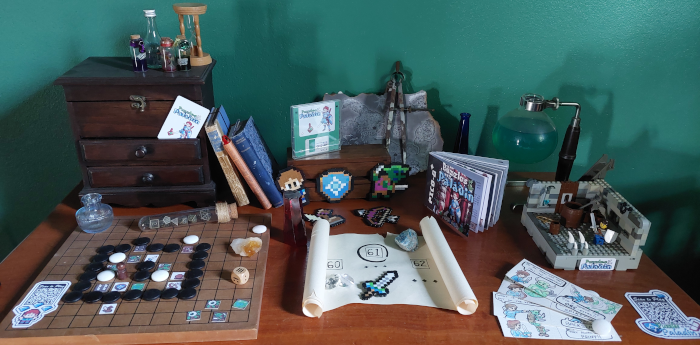
The list of extras has grown long: desktop backgrounds, physical world map, book of lore, higher resolution game art, digital and physical instruction booklet, QR code stickers, comic strips, physical level design version, NFC chips, perler bead sprites, photo/video shoot scene, LEGO models, voxel sprites and animations, 3D prints, floppy disk cartridge, and even more to come!
Some of these extracurricular activities helped me during development. Some of them doubled as promotional material, great for marketing. And some of them were purely for the joy it brought me personally, because —well, you know— I'm a NERD!
 View Game Dev Extras
I have made a separate page specific to all this with many images and details. I hope it will motivate and inspire you all to take this hobby of ours and stretch it in every way possible, especially beyond the digital realm and out into our tangible reality.
Free Music Jam 2024
by Packbat & Bikibird

Packbat: The whole thing started back in October when someone on the official unofficial PICO-8 Discord proposed a collaborative PICO-8 album. That still sounds like a cool idea if folks want to organize it, but during that discussion, another participant suggested making the tunes available for people to use in their games, and bikibird said, "Sounds like a good idea for a game jam." That's really where the PICO-8 Free Music Jam started: musicians looking for an excuse to make more music, and seeing a chance to do something for the community.
From there, the lot of us hashed out ideas - Do we want to have a theme? Should we ask programmers to volunteer carts to score? What about PCM? What about cover versions? - and the idea coalesced down to something pretty simple: make a piece with the PICO-8 tracker, original or based on a public domain score, and release it on a cart for free with instructions for whoever would like to use it in their games. And it didn't seem like any of the really popular PICO-8-centric jams were happening in February, so February is what we picked for the date.
We also provided resources for folks interested in participating. Us Packbats gathered together a bunch of links from the Discord, from past PICO-View issues, and elsewhere around the Internet; and Bikibird wrote a visualizer cart for all of us to use.
Bikibird: A music cart is really an album and albums deserve cover art and visualizers. Thus, the album cart was born. Jammers were encouraged, but not required, to use the album cart as a container for their music. The sprite sheet served as the album art. Musicians had a choice of just displaying their album art or adding a visualizer to run on top of the art.
The bubble visualizer expanded each time a note played and then slowly deflated. There was also a rippling pond and twinkling stars as well as the more traditional piano roll and harp visualizations. The modular design of the album cart even made it possible to add custom visualizers with just a little bit of code. Ericb created a neat rain effect for his cart.
Overall, the album cart added an extra bit of fun to the jam. I look forward to adding more visualizers for next year’s jam.
Packbat: As a contributor, it was amazing having bikibird's cart to use - really let those of us who just wanted to make music participate much more easily.
It was also amazing to have paraK00PA's wonderful art for the jam page (used also as this article's banner) - we'd put together a placeholder based on the SFX tracker UI, but paraK00PA's art really helped make the page feel like a professional game jam.
And the jam worked out! We got thirteen musicians sharing ... almost forty tracks? Folks wrote a ton of stuff for it, across a bunch of different moods - melancholy, peaceful, strange, tense, hopeful, cheerful, chill, bright, eerie, upbeat - which is exactly what we hoped for.
Bikibird: Although the jam officially ended on leap day, the jam really isn’t over until all these wonderful tunes find homes in new games. Check them out and take advantage of the free music. Just be sure to credit the composer/arranger appropriately.
We’re already looking forward to next year’s jam. Hope to see you there!
Most of all, have fun!
Editor's Note: We've compiled all of the CC licensed songs that were submitted to the jam for your convenience. The "Game Genre Audio" description is purely suggestion based on how the songs made us feel, and we hope it helps you find the right song for your game.
| # | Song Title / Link | Game Genre Audio | Author | License* |
| 1 | 20th-Century Ops | Action, Sci-fi, Futuristic (rock) | ridgek | CC4 BY-NC-SA |
| 2 | So High | Action Puzzle, Adventure (fast) | SmellyFishstiks | CC4 BY-NC-SA |
| 3 | Dream Passage | Puzzle, RPG, Adventure (soft) | SmellyFishstiks | CC4 BY-NC-SA |
| 4 | Too High | Dungeon Crawl, Horror (haunting) | SmellyFishstiks | CC4 BY-NC-SA |
| 5 | Cthulu Calling | Adventure, Puzzle (spooky) | Extar | CC4 BY-NC-SA |
| 6 | Sanity Slipping | Dungeon Crawl (dark) | Extar | CC4 BY-NC-SA |
| 7 | The Midnight Oil | Adventure, Puzzle (mysterious) | Extar | CC4 BY-NC-SA |
| 8 | Laser Rot | Action, Shooter, Boss Fight (fast) | Packbat | CC4 BY-SA |
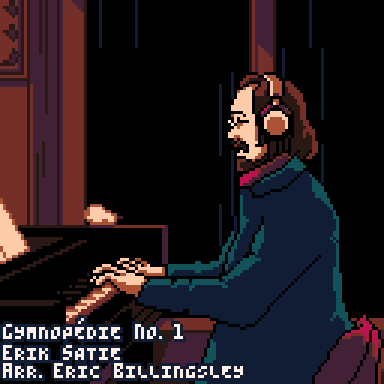
| 9 | Gymnopédie No.1 | Puzzle, Adventure, Casual (calm) | ericb | CC4 BY-NC-SA |
| 10 | Gymnopédie No.2 | Puzzle, Adventure, Casual (calm) | ericb | CC4 BY-NC-SA |
| 11 | Gymnopédie No.3 | Puzzle, Adventure, Casual (calm) | ericb | CC4 BY-NC-SA |
| 12 | Relax, Stay Awhile | Intro, Credits, Menu (peaceful) | robt.fm | CC4 BY-SA |
| 13 | Junkyard | Dungeon, RPG (spooky but builds) | robt.fm | CC4 BY-SA |
| 14 | Ghost Town | Adventure, RPG (upbeat) | robt.fm | CC4 BY-SA |
| 15 | Bubble Hop | Puzzle, Adventure (upbeat) | Nerdy Teachers | CC4 BY-NC-SA |
| 16 | Wanderlust | Puzzle, Adventure (slowly builds) | Nerdy Teachers | CC4 BY-NC-SA |
| 17 | Shadowfall | Puzzle, Dungeon Crawl (mysterious) | Nerdy Teachers | CC4 BY-NC-SA |
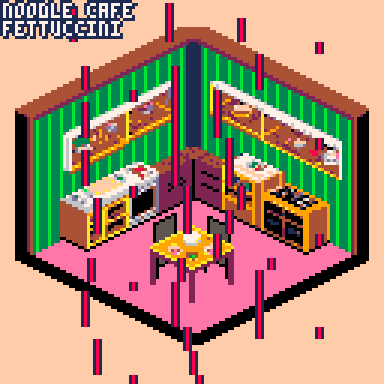
| 18 | Noodle Cafe | Adventure, Casual, Action (uplifting) | Fettuccini | CC4 BY-NC-SA |
| 19 | Storytime | Casual, Adventure (lullaby) | Fettuccini | CC4 BY-NC-SA |
| 20 | Cursed Storytime | Horror, RPG (creepy) | Fettuccini | CC4 BY-NC-SA |
| 21 | New Beginning | Intro, Menu, Credits (peaceful) | Fettuccini | CC4 BY-NC-SA |
| 22 | Foggy Forest | Adventure, RPG (mysterious) | Fettuccini | CC4 BY-NC-SA |
| 23 | Forever Again | Adventure, RPG (calm mysterious) | Fettuccini | CC4 BY-NC-SA |
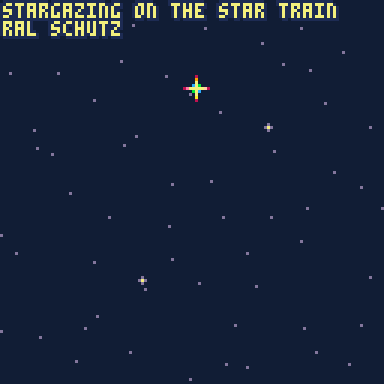
| 24 | Star Gazing | Adventure, Casual, RPG (peaceful) | naramel | CC4 BY-NC-SA |
| 25 | Garden Planet | Action, Shooter (fast) | naramel | CC4 BY-NC-SA |
| 26 | Burning Core | Action, Adventure, Futuristic (fast) | naramel | CC4 BY-NC-SA |
| 27 | Waves | Adventure, Beach scene (dreamy) | Marceline | CC4 BY-NC |
| 28 | A Safe Place | RPG, Casual (classic JRPG) | wasiknighit | CC4 BY-SA |
| 29 | Intro | Puzzle, Casual (light spooky) | Munchkin | CC4 BY-NC-SA |
| 30 | Shallow Shadows | Puzzle, Adventure (dark) | Munchkin | CC4 BY-NC-SA |
| 31 | Entering the Umbra | Dungeon Crawl, RPG (mysterious) | Munchkin | CC4 BY-NC-SA |
| 32 | Shadow Dancing | Puzzle, RPG (dark upbeat) | Munchkin | CC4 BY-NC-SA |
| 33 | Lost in Shadow | RPG, GameOver, Credits (sad) | Munchkin | CC4 BY-NC-SA |
* CC4 = Creative Commons 4.0; BY = Attribute; NC = Non-Commercial; SA = Share Alike
![]()
New Community Stars
by Nerdy Teachers
Last year we created a mini-biographies page with so many of the biggest names in the community. It was a lot of fun to learn more about each other in the process. That page stands as a great way to break the ice and introduce ourselves to new members of the PICO-8 Community.
If you haven't seen it yet, read them all here:
We've added 2 more stars!
Bikibird
I'm probably best known for Speako-8, a speech library for PICO-8. My love of programming started in my teenage years when my father brought home an Apple II. As my skills grew, I went on to write articles and programs for various computer publications: Nibble, Call APPLE, II Computing, etc. Now, PICO-8 brings back the joy and excitement I felt in those early days of computing.
Packbat
We're a plural system (More Than One) from the mid-Atlantic USA; we grew up playing the piano but dropped off in college, and PICO-8 is how we started making music again and how we began composing our own original music. We made an infographic about making more legible graphics in PICO-8 - and a few miscellanous carts, but mostly we make music. We also helped organize the MidiLib on the BBS. If you like making custom SFX instruments, feel free to get in on the party; we try to check occasionally for new posts in the tag.
We are keeping our eyes out for more rising stars out there so keep working hard, helping others, and making amazing PICO-8 (and Picotron) games, tools, and content.
![]()
PICO-8 Update
0.2.6
PICO-8 is inching ever closer to its 1.0 final release, and we are happily surprised at the new features and updates that we are still getting before that happens! (THANK YOU ZEP!)
Lazy Devs Academy has once again done a deep dive video on most of the updates in this new release, so if you haven't seen that yet, here it is:
There are two specific new features we wanted to highlight in our zine to provide a little more of a tutorial and demo on how to use them. The first is about the inverted fill when drawing shapes which is how I created the transition in Puzzles of the Paladin. The second is about the waveform instruments and editor and a very useful tool that you can use alongside it by Luchak.
So, let's jump in.
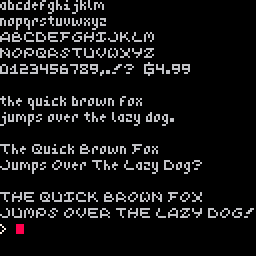
Drawing Inverted Shapes
by Nerdy Teachers
You can now invert the drawing operation of circfill, ovalfill, and rectfill! That means you can now fill the outside of those shapes, creating a window of that shape where you do not draw.
Unfortuntately, it isn't as easy as calling some new functions so it actually takes a couple extra steps to get it working in your game. You could build custom functions if you'd like but here are the steps you need to take and an example of how I made it easier on myself without even making custom functions.
First you need a single poke to turn it on. You only have to do this once so you can paste it at the top of your code and forget about it.
poke(0x5f34, 0x2) --activate inverted shapesAfter that, any time you want to draw an inverted shape, you must then also include a special hexidecimal code in the color argument like this:
rectfill( x1,y1,x2,y2,0x1800 )However, we can make that part easier by storing 0x1800 in a variable named invert. This way, anytime we want to invert a shape, we just write "invert" in the color argument which makes it nice and readable!
rectfill( x1,y1,x2,y2,invert )
ovalfill( x1,y1,x2,y2,invert )
circfill( x1,y1,r,invert )
Doing it just like that will fill the outside of the shape with black. To change it to a certain color in your palette, just add the color number!
rectfill( x1,y1,x2,y2,invert+12 ) --12: light blue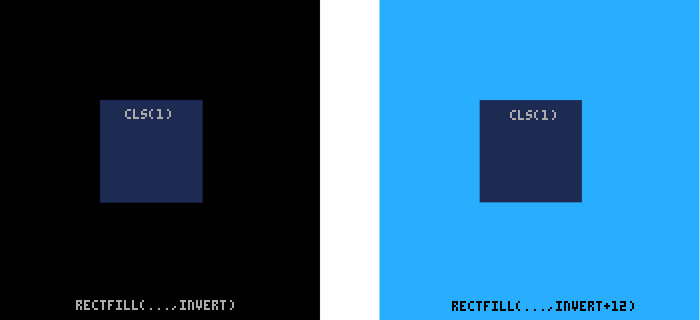
Here's the full code for how we created that example and you can see it's really quite simple:
function _init()
	--activate invert shapes
	poke(0x5f34, 0x2)
	invert=0x1800
end

function _draw()
	cls(1) --dark blue
	rectfill(40,40,80,80,invert+12)
end
Inverted Shapes with Fills
I used this feature in my latest game to create the transition effect between scenes. This type of circle transition was quite difficult to do before, but now it's very simple!
Since the filled shapes can be manipulated with the fill pattern function, we can even take it a step farther and create this gradual fade effect by drawing multiple inverted circles with different fill patterns. That's what gives it that dithered look, perfect for transitions and even lighting effects!
Here's how I did it.
fillp(░)
circfill(64,64,r,invert)
fillp(▒)
circfill(64,64,r+10,invert)
fillp()
circfill(64,64,r+20,invert)
You might not know that fillp() can accept PICO-8 glyphs! As you can see, I used the scattered glyph first, then the checkered glyph second, then reset fillp() before drawing the final outer inverted circle all black. Each new fill pattern is applied to the drawing of the following inverted circle.
Also notice that the radius of each circle ( r ) is shared between them, except that I added 10 and 20 pixels to the second and third circles being drawn. This of course widens the inverted circle so that you can still see part of the smaller inner circles.
It makes more sense if you think of these draw calls as layers.
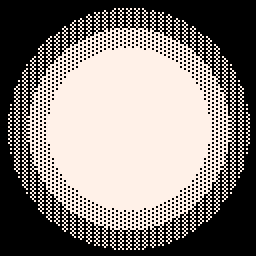

It was that simple to draw!
To animate it, all I had to do was change r within _update so that the circles could shrink and grow. And the final touch was to change the position of drawing the circles from the center of the screen (64,64) to the player's location. This gave the effect of seeing the player first, and revealing the rest of the room for each level (see gif above).
So thank you Zep! This was a fantastic addition to the many many PICO-8 features we now have.
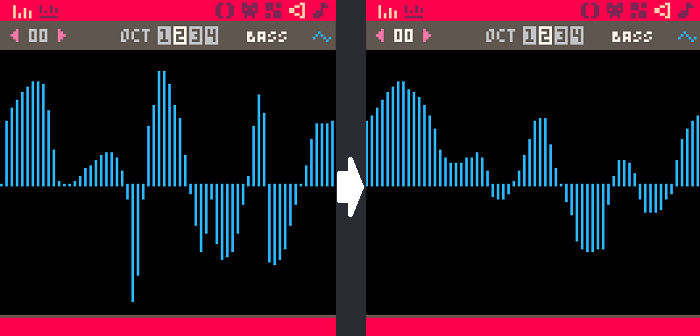
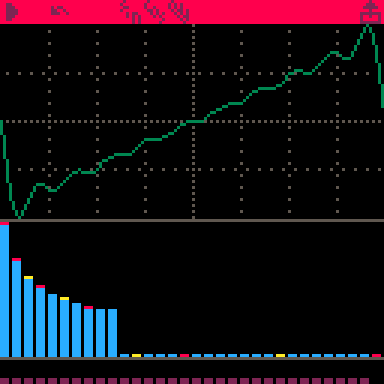
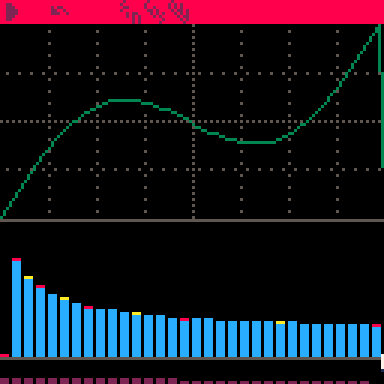
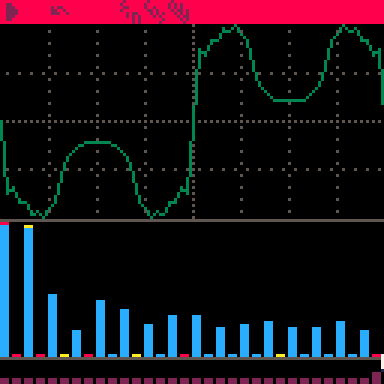
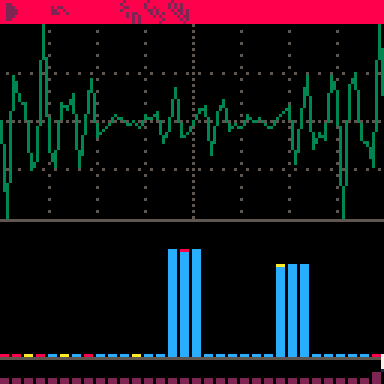
PICO-8 Waveform Instruments
by luchak
The new PICO-8 release brings a new waveform SFX type, dramatically expanding its acoustic palette and providing access to timbres not possible before: vocal-like formants, metallic inharmonic tones, pure sine waves, and more. In this article, I'll show you how to use waveform instruments in PICO-8, then demonstrate some basic techniques for waveform editing.
Getting Started with Waveforms
Drawing and using your first custom waveform is easy. To begin, open up the PICO-8 SFX editor, choose an SFX between 0 and 7 to edit, click the zigzag icon to switch the editor into waveform view, and start drawing. Press space to hear your wave.
To use your wave in another sfx, you’ll need to reference it as a custom sfx instrument.
To do this, click on the little circular button to the right of the waveform selector, select the sfx number of the wave you just drew, and start entering notes. You’ll notice that the instrument number shows up in green in the tracker view, indicating that you’re using a custom instrument. Try setting up a looping sound effect, setting it to play, then going back to edit your wave!
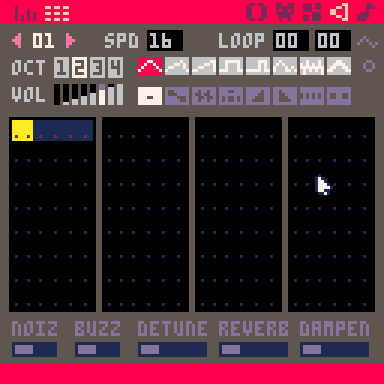
If you want to get really advanced, you can even use custom waveforms in other sfx instruments.
Thinking In Frequencies
Once you’ve spent a little time doodling waveforms, you may find that getting the sounds you want can be harder than you might have expected. It’s easy to get buzzy sounds, but hard to get other kinds, and the way that your changes work isn’t always intuitive. Even waves that look quite different can sound similar.
For example, the waveforms A and B below sound almost identical. However, while C looks fairly similar to A, it actually sounds noticeably different.
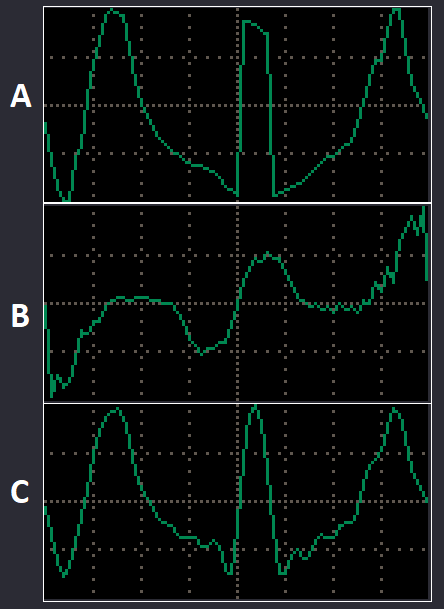
So what's going on?
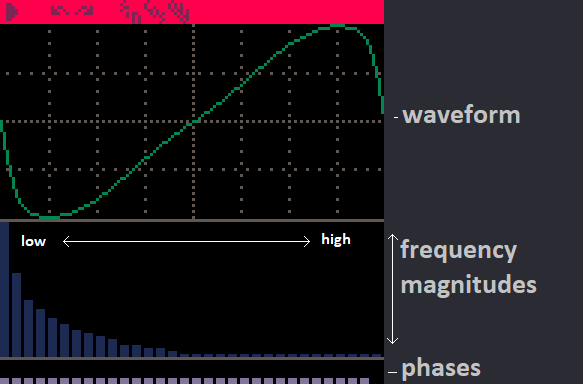
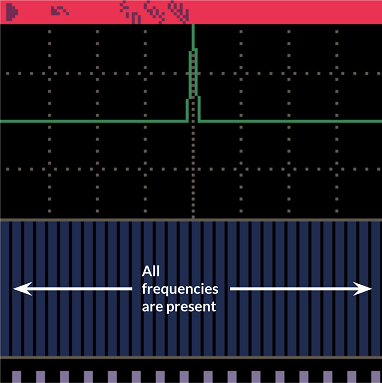
You can view any waveform in two different ways: (1) as a sequence of values over time (like the waveform editor shows you); or (2) as a mixture of sine waves of different frequencies. Here are some short animations showing the first few frequency components that make up a square wave and a saw wave.
Square Wave
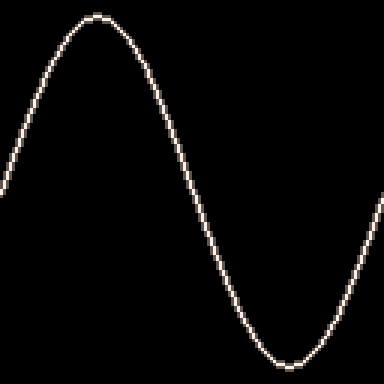
Saw Wave

(Component sine waves are drawn in bright colors, and their sum is drawn in white.)
It turns out that the frequency view is much more representative of how human hearing works. The human ear is not especially sensitive to the exact shape of a sound wave, but it is very sensitive to which frequencies are present, and to how loud those frequencies are - the frequency magnitudes. It is much less sensitive to how those frequencies are positioned side-to-side relative to each other - the frequency phases.
For example: the wave in this animation below will sound almost identical to the saw wave above! The reason is that all the frequency magnitudes are the same - only their phases have changed.

Because of this, if you want to design waveform instruments effectively, you need to think about their frequency content. Are there more high or low frequencies? What are the relationships of the loudest frequency components to each other? Are frequency peaks isolated or clustered? All of these factors will dramatically affect the character of your sound.
Basic Frequency Editing: Sharpening and Smoothing
PICO-8’s built-in waveform editor does not make it especially easy to make controlled frequency edits, but there are still a few tricks you can keep in mind. The most important tip to remember is probably: sharper looking waves will sound brighter or buzzier, and smoother looking waves will sound darker and more mellow. To add a little bit of edge to a smooth sound, try subtly flattening out some of the round edges.
Or, to take the edge off, try to round out sharp peaks or corners. The closer the result looks to a smooth sine wave, the less buzzy your wave will sound. This can be hard to do by hand, though, since even tiny deviations from smoothness can add a surprising amount of high-frequency content.
If you want more control and access to a dramatically larger sonic palette, you should consider editing frequency volumes directly. See my next article on how to use a wave designer tool I created to do just that.
- luchak
Precise Frequency Control
 with Wave Designer
with Wave Designer
by luchak
I’ve made a PICO-8 cart to help you design waveforms, available on the BBS here: Wave Designer, or as #wave_designer. It will import and export waveform sfx in PICO-8’s sfx clipboard format, so you can use the results in your PICO-8 carts. In this article, I'll explain how to edit waves in Wave Designer, how to export the results to PICO-8 sfx, and show you how to create some sounds that would be extremely difficult to draw by hand.
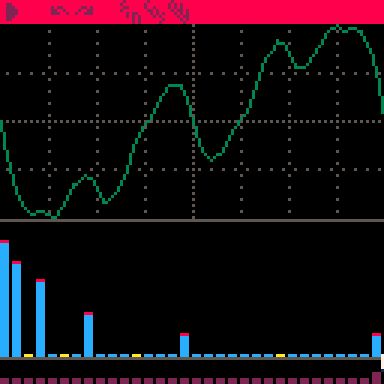
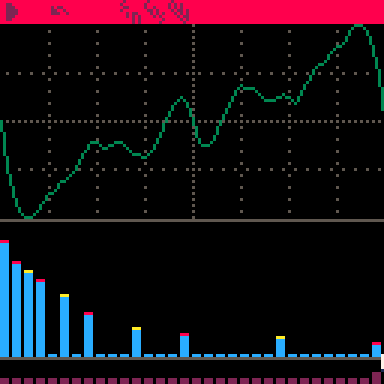
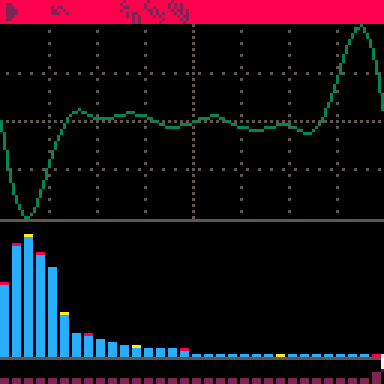
Usage
In Wave Designer’s window layout, the top green line is the waveform as you would normally view it, the middle blue bars are the volumes of each frequency that make up the wave (very important), and the bottom bars are the frequency phases (much less important). You can play the sound with the same keys as the PICO-8 tracker, or use the play button to play a short looping sequence using your wave.
To edit a wave from PICO-8’s waveform editor, navigate to your waveform sfx in the PICO-8 editor, and copy it to the clipboard using ctrl+C (cmd+C on Mac). You should see a message pop up, saying something like “copied sfx 0”. Then, start Waveform Designer, paste your sfx using ctrl-V (cmd-V on Mac), and click the import button (second from the right, with the down-pointing arrow). Make your edits, then click the export button (far right, up-pointing arrow) to put an sfx into the clipboard. Go back to the PICO-8 sfx editor and paste your edit. That’s it!
You don’t have to start from the PICO-8 waveform editor, though. You can just get drawing in Wave Designer, or you can use the left and right arrow keys to cycle through some preset waveforms. More detailed usage instructions are available on the BBS thread.
Note for Mac users: PICO-8 copy/paste on the web version is very finicky in Mac browsers. You will have to press both cmd-C and ctrl-C (in some order) to copy, and both cmd-V and ctrl-V (in some order) to paste. If you have a Mac, I recommend using Wave Designer in desktop PICO-8.
Editing With Frequencies
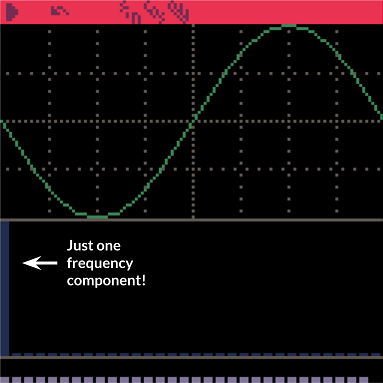
With usage out of the way, let’s take a look at what you can do with full frequency control. First things first: if you have only a single frequency present, your waveform is a nice clean sine wave. And if your waveform is a big spike, then you have all frequencies present at equal volume.
The fact that spikes contain all frequencies explains why even tiny sharp edges in the waveform view can be very easy to hear - each little discontinuity acts like a little spike, introducing energy across the entire frequency spectrum. If you’re curious, here’s what it looks like to progressively build that spike up from lower frequencies, like we did for the saw and square in the previous article:

If you get creative with frequency editing, you can create a large range of different timbres. Here are seven things to try out in Wave Designer:
1. Use only octaves (red-tipped bars) to make a very clean organ sound.
2. Start adding fifths (yellow-tipped bars) for a richer pipe organ sound.
3. Make vowel-like sounds by setting one or two “peaked” clusters of low to middle frequencies.
4. Zero out a wave’s high frequencies to make it sound muffled or darker.
5. Zero a wave's fundamental (its lowest frequency) to reduce its bass presence.
6. Use the “odd” button to keep only a wave’s odd frequencies - this makes it sound hollow, or like a wind instrument. (If you do this to the default saw wave it becomes a square!)
7. Make a wave with no low frequencies and one or two clusters of middle to high frequencies for a metallic/ robotic sound.
These suggestions are just a few starting points - lots of other sounds are possible if you explore. Also remember that you can use these waveforms in other custom instruments, or apply PICO-8’s built-in effects to them, for even richer sound design possibilities. So get experimenting! I can’t wait to hear what you create.
- luchak
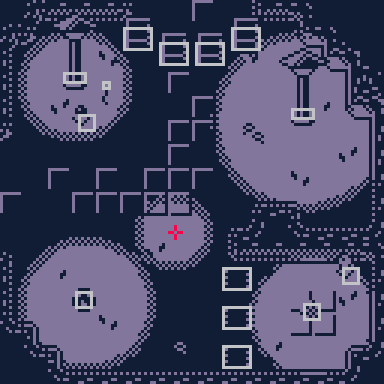
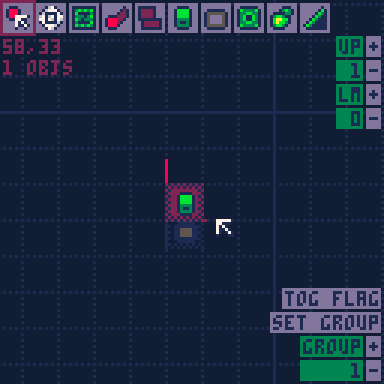
Simple Level Edit and Loading System
by jack Raymond (Gravitoid)
"I am making maps for my Pico-8 game but I am hitting the map size limits!"
"I want to rearrange my map rooms because I ordered them wrong!"
"I want to save my map space so I can use all 4 tabs in the sprite sheet!"
If you’re like me, you’ve had all these problems before and are continually working to find crafty new ways to push the limits of PICO-8 and cram more into a single cart than you should be able to with standard techniques. For all the expression the smallness of PICO-8 encourages, sometimes you just want to get a little more out of it. The map editor carts I describe here will be available for you to download and modify at the end of this article.
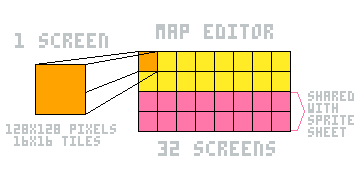
First, let’s discuss what it is we are trying to do; maps are limited in PICO-8 and generally at base capacity allow only for 32 screen-sized maps made from 256 tiles (8x8 sprites) per screen. And if you want to use all 32 screens of the map, you'll need to give up half of your sprite sheet.
Thankfully, PICO-8 has a character limit of 65,535 that can be written in the code editor. Many of the Pico-8 carts published to the BBS still don’t approach the limit of characters. So we can safely use this free space to store our extra map data, saved as characters.
We need two functions. First, a function which takes the map data as shown in the map editor and converts it to a string of characters. Second, a function that performs the inverse operation, converting the string of characters back to map data. This is similar to compression and decompression, which are also good to implement in a system like this, but in this example we will not be going into compression methods.
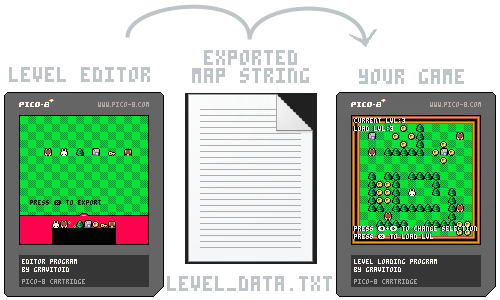
Here I have the flow for how map editing to final game is intended to work:
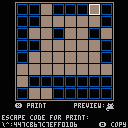
The Level Export Function
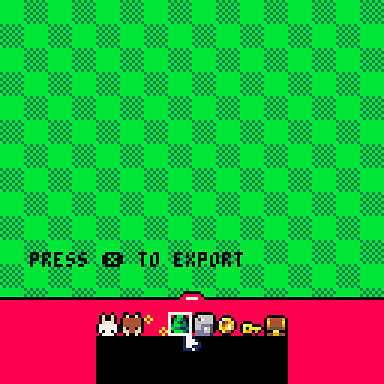
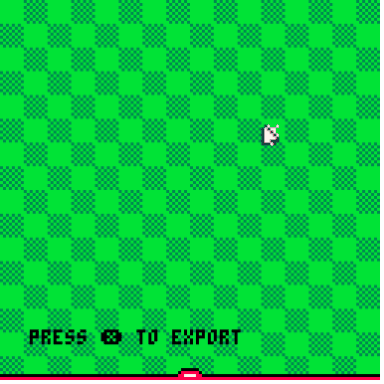
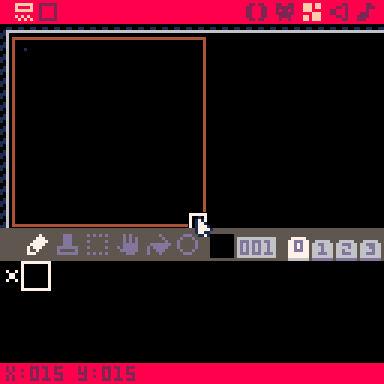
This is how my editor.p8 program looks at runtime and it allows you to edit and export the map data without needing to edit the PICO-8 cart itself.
You do need to paste your sprites into this editor cart though. Skip the first row and paste into the second row of the cart. The function will adjust for this difference in sprite numbers.
Let’s have a look at the export_level() function:
function export_level()
 result=""
 for y=0,15 do
  for x=0,15 do
   tile=mget(x,y)
   if tile!=0 then
    str=(tile-16)..","..x..","..y.."/"
    result ..= str
   end
  end
 end
 --
 printh(result,"level_data.txt",true)
end
The function works as such: loop over the X and Y positions of the first screen’s map tiles, get the current tile at each position, check if it’s not tile 0, and then concatenate the tile index with its X and Y position separated by commas, end it with a forward slash, and append it to the result string, then after checking all tiles, write the result to a text file using the PRINTH() method.
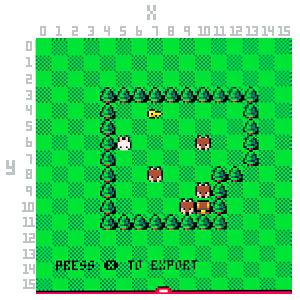
When pressing the ‘X’ key with the above-drawn example, the following gets exported into a level_data.txt file and the parent folder should automatically open for you. Open the file in a text editor and you'll find a string like this:
3,4,3/3,5,3/3,6,3/3,7,3/3,8,3/3,9,3/3,10,3/3,11,3/3,12,3/3,13,3/3,4,4/6,7,4/3,13,4/3,4,5/3,13,5/3,4,6/0,5,6/1,10,6/3,13,6/3,4,7/3,13,7/3,4,8/1,7,8/3,11,8/3,12,8/3,4,9/1,10,9/3,11,9/3,4,10/1,9,10/7,10,10/3,11,10/3,4,11/3,5,11/3,6,11/3,7,11/3,8,11/3,9,11/3,10,11/3,11,11/
How neat is that? From the example shown, the first three digits ( 3,4,3/) give us the sprite index of the tree (3), the X coordinate (4), and the Y coordinate (3). The forward slash (/) at the end separates each sprite in the level. All we need to do to get this prepared for the level loading function is to remove the last forward slash at the end of the string.
We will store each level data string in a table called map_data and load the level from this table. The level storage on the game cart will end up looking something like the following:
map_data={}
map_data[1] = "3,4,3/..."
map_data[2] = "4,6,8/..."
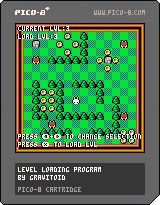
map_data[3] = "2,5,9/..."Here is the process of using our level editing cart to build a level, save it as a string, and paste it to a game cart as map_data:
Level Loading
When normally loading map levels the way Zep intended with the map editor, you would move the camera around the map space, letting the player see a different portion of the entire map. However, with the system we are creating here, we are not going to write the levels to the whole map. We will be writing the level data to the first screen space only, then erasing it and rewriting the next level's map data in the same space. No need to move the camera around.
The loading function, however, could write wherever you need in the map or even directly loading objects into other data structures.
function load_lvl(i)
 --wipe
 for y = 0,15 do
  for x = 0,15 do
   mset(x,y,0)
  end
 end
 --load
 local str = map_data[i]
 local obj_tbl = split(str,"/")
 for obj in all(obj_tbl)do
  local id,x,y = unpack(split(obj,","))
  mset(x,y,16+id)
 end
end
The function reads as follows:
Erase the map by double looping over the map tiles along X and Y axes, and set each tile to 0, the default empty tile. So your game should leave the first tile in the sprite sheet as the default white X to remain blank.
Then we load the map_data table and get the string at index i which is passed into the function (this is the level index to load). Next we split() the whole level data string into a table of strings, the local obj_tbl variable.
Loop over all strings using the for in all method. Inside this loop, we again split the string by the commas this time into a table of components, with the (sprite index, X, Y) values for each object. This split is tucked inside of UNPACK() which returns each value of the split table. We place these variables into the ID, X, and Y local variables respectively. Finally, we write each object into the map with MSET().
And that’s it! Here are the carts:
Level Editor
Level Loader
Final notes
Beyond map storing and loading, there are many other applications for such a system of storing and loading data at runtime, from enemy placement, map variants, unmarrying the map foreground from the backgrounds, perhaps storing extra sprites. I look forward to seeing what interesting takes others have on such a system, and I hope this fuels your interest into implementing such a system into a project of your own!
Rapid Reviews
Game Recommendations on
New Releases: Jan - Mar 2024
![]()
These five new games earned the coveted "Featured" status on the BBS:
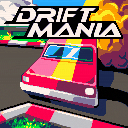
Driftmania
A time-trial driving game with classic top-down racing controls and precision drifting mechanics. You can even customize your car!
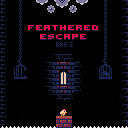
Feathered Escape
The sequal to BAS, but this time a precision platformer with tight controls, the chicken is still escaping saws. Great for speedrunning challenges.
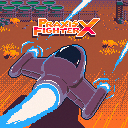
Praxis Fighter X
A single stage shmup/stg/shoot'emup with a classic look but modern gameplay. A great highscore chasing shooter.
Oblivion Eve
A roguelike action-platformer where you use upgradeable weapons and perform combos to defeat enemies and navigate a strange world full of lore.

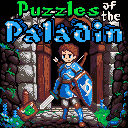
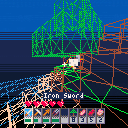
Puzzles of the Paladin
A dungeon puzzle game with 62 levels where you pick up weapons to efficiently move about and kill monsters to escape each room.
![]()
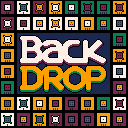
Backdrop
A casual match-3 style puzzle game with added layers of complexity that brings new challenge to the genre.
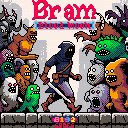
Bram: Blood Moon
A zelda-like adventure game with multiple dungeons and secrets in a huge map that was impressively managed to fit into a single cart.
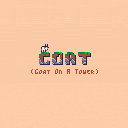
Goat
An action puzzle game where you are a goat navigating a small mountain top maze that is ever changing and you try not to get pushed off the sides.
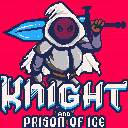
Knight and prison of ice
A dungeon crawling adventure game with unique combat of calling an enormous floating sword to follow you, damaging enemies along its path much like Thor's hammer.
linecraft
A technically impressive demake of minecraft using lines to draw the world; complete with mobs, gathering, crafting, building, and more.
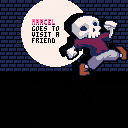
marcel gets to visit a friend
A precision platformer about visiting a friend who "forgot" to turn off the traps.
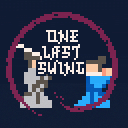
one last swing
A samurai themed fast reaction dualing game with a rock-paper-scissors style attacks with a large variety of characters and hidden tells in the background.
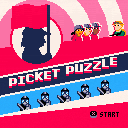
picket puzzle
A puzzle game with snake-like movement through sokoban-like levels of workers on strike gathering together to push back on the police and take over government buildings.
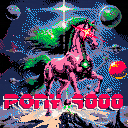
pony 9000
A classic style horizontal shmup where a mecha-space-synthwave pony goes on a revenge rampage with powerfull space lazers against a giant space trout.
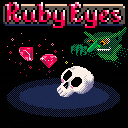
ruby eyes
A roguelike tower crawler to find those beautiful Ruby Eyes that would perfectly match your skeleton frame! Be careful, the Necromancer might not like their gems taken!
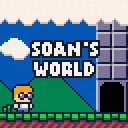
soan's world
A kid-friendly super mario style platformer with forgiving mechanics and a cute style. Help Soan collect tomatoes, defeat baddies with your green laser and prepare to face the might of Devo the Devil!
unleashed
A highscore chasing endless runner where you are a dog trying to collect as many bones as possible while avoiding cars and bicycles. Great controls and animations making for smooth gameplay.

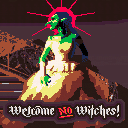
welcome no witches
A Papers Please style game but you are the doorman for princesses gathering for a ball. The gala started, the dresscodes are strict, let's try to guess, who is a witch!
Featured Game Review
Must Play Eve-ryday
by Achie
Did I already tell you I like roguelikes? Because I do. There is a nice satisfaction to learning how the world works, figuring out map generations, enemy AI patterns, weapons, combos, upgrades and all that jazz while constantly being on the verge of death. That is what really grabs me, the ever looming possibility of instantly ending a run, which makes the victory that much sweeter in the end. The blood pumping thrill of each encounter, that is standing between you and the ending!
Imagine all this with the satisfaction of a style meter and a deep combo system on top of an action platformer, and you got one of the best combat and gameplay feels in a while, so sharpen your blades (blunt your hammer?) and prepare to send every enemy into Oblivion! (Hell yeah, still got it!)
So boot up your cart, and let’s go!
Immediately greeted by a beautiful boot sequence, SmartAlloc doesn’t waste any time to show off their skills and the beauty of the game. Published in early March, 2024 this game was one of the hottest awaited games. Beautifully animated, smeared and crafted combat screenshots were already teased earlier so we were just waiting for it to drop at any time.
The game transports you to a weird otherworldly prison, that is every shifting in layout to hopefully prison the chained titan forever and discourage any foolish actor to free them. Thankfully we are anything but average, wielding an ethereal arsenal of weapons that change over time while we venture deeper and deeper into the prison.

Choose your weapon from the mystical arsenal and dive deep into the depths! Movement is pretty simple in its premise. ⬅️⬇️⬆️➡️ to move around as you would expect, 🅾️ is your jump button, allowing wall jumps by default, and in-air it also gives you the ability to dodge once, before landing again! ⬇️➡️ also lets you dash on ground, but be careful as standing on top of a semisolid might just let you drop!
The real meat of the games comes with ❎, your attack button. Standing on ground it just generates a light hit, but you can modify this several ways. Just holding a direction while attacking creates a special angled attack towards that direction. Pressing attack and direction at the same time creates special hard hits that reach longer and hit harder. On top of all this, aerial attacks differ from ground ones, so you can quickly see how combo-ing and keeping track of where you are modifies your attacks!
So what do we do with all this power? We gather upgrades of course, the quintessential part of any roguelike. Wandering around the prison you will find enemies guarding an upgrade, a tricky platforming challenge in your way, or just an empty room with it for a slight breather.
Did you stumble upon a room like this? I suggest cleaning all others first to acquire power.
How? Quite simple! Vanquishing all enemies in a room unlocks the ability to pick it up, where the deep configuration of the game comes into play. Upgrades. 3 choices per upgrade, that could just slightly alter your power (plus size for you attacks, quicker cooldown …) or can totally change how you play.
Did you start with a hammer? How about changing all your aerial attacks into a sword attack? As each weapon has their own stat in speed, cooldown, combo generation your combat effectiveness is highly customisable.
And it will need to be to prepare for what is coming. Your final goal is to defeat the 4 gems, keeping the titans enchained. And they don’t give up that easily. Remember the room I showed you? Let’s see what will happen if we go too far into it!
A boss fight of course! Hitting the gem is your main goal as fast as you can! But it doesn't just let you hurl attacks at them, various counter attack patterns await those who dare to challenge them, and you will need all the power you can muster up! And power we shall unleash with our final attack!
Yes that is our final solution, a powerful ultimate attack! Because all throughout this article, I haven’t talked about the combo meter!
You see, attacking anything generates some amount of meter, that differs with each weapon, possibly modified by each upgrade, and fills your combo meter shown above your health! Reaching a new stage boosts your stats but also allows you to release the combo meter in one glorious energy beam! Master Roshi would be proud!
Defeating the first crystal lets you progress further until you either perish by the prison or clear all four of them and release the Titan, the final goal of the game, which I can show you of course, I managed to get there in every single run, without looking at the monitor, but I just don’t want to spoil it to you, trust me!
I don’t think I need to tell you that the game looks unreal! It feels out of PICO-8 by all means and is a masterwork at every level of detail you need. The beautiful “dullness” of color of the prison tiles, the enemies being highlighted by the pink colors, the attack frames, the transitions, everything is just polished to the limits!
The music done by Extar is just dark enough to let you sell the ethereal otherworldly vibe of the prison while pumping you up for each room, bossfight and ultimate attack! The sound effects by Munchkin are crips, hard hitting and just giving the oomph and juiciness to match the banger ost and the high octane action!
I cannot state how good this game is. Go ahead, open the link and play it! (after you read through the issue of course :P ) I think everyone needs to try it to see how far games can be pushed and how well they can be polished! Deserving of the featured status on the BBS for sure, amazing work by everyone who contributed, hats off to you all!
About the Author
I stream PICO-8 gameplay and PICO-8 game development on Twitch, as well as write detailed dev logs and a game review series called "Pico Shorts".
Thanks for reading!
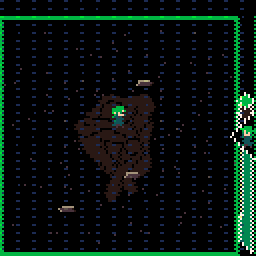
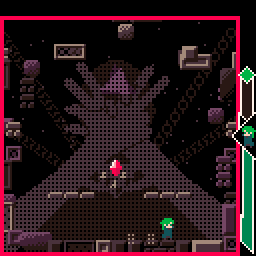
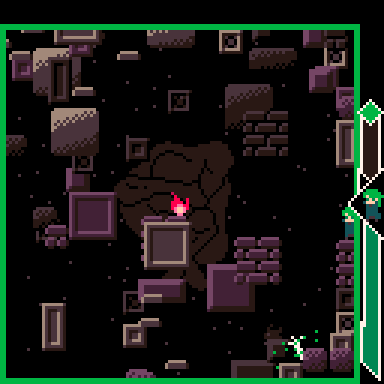
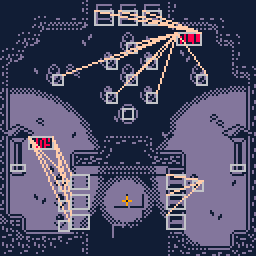
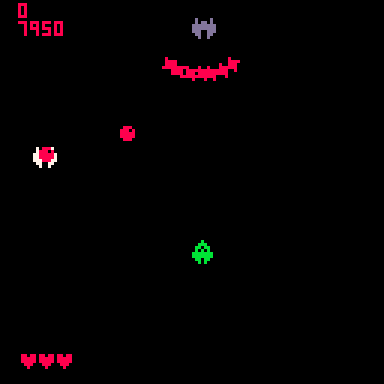
Oblivion Eve:
 Map Transition Animations
Map Transition Animations
by Smartalloc
Hey guys, I’m SmartAlloc, the developer behind the recently released Oblivion Eve. The game incorporates a lot of different techniques to provide a unique feel, and out of all of them, the map transition effect seems to garner the most notice. As such, I’m happy to delve into the specifics behind this simple and easily implemented effect which provides considerable amounts of snazz and pizazz!
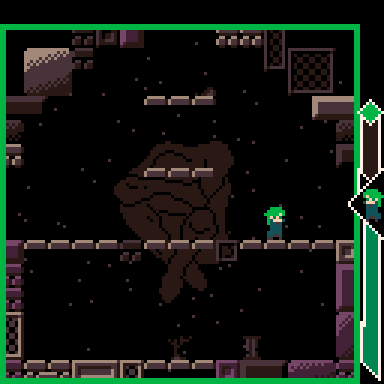
Overview
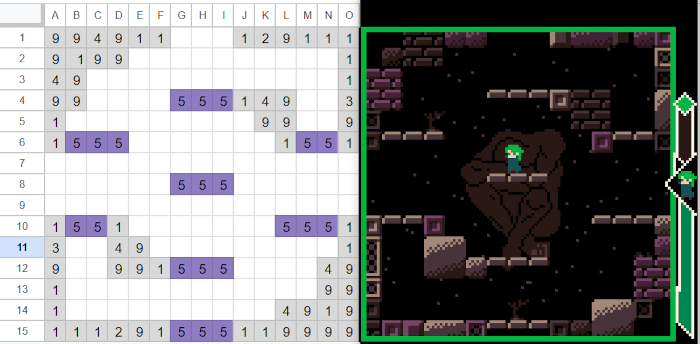
As you can see, upon navigating from one room to another, the tiles comprising the room rearrange themselves into the new layout. First and foremost, it’s important to note that this technique doesn’t utilize the basic Pico-8 map() functionality - namely because use of map() doesn’t allow you to independently manipulate tiles. Rather, we’ll be drawing these tiles with spr(). As such, you’re welcome to either continue to use the inbuilt PICO-8 map editor, or any other means to store maps.
You’d expect a knowledgeable and experienced developer like myself to use a complex and comprehensive tiling software, right? Wrong! I use Excel to draw maps, like a heathen! Never be afraid to use your most comfortable tool, so long as it doesn’t negatively impact your development process.
Setup
Once we’ve gotten our map layout established, we need a way to parse through its contents and keep track of every tile. Upon loading into a new room, simply iterate over the contents of the layout, and store the relevant data for each tile into an array element. I’d recommend keeping track of:
| Variable | Use |
|---|---|
x_current |
The x position of the tile during motion |
y_current |
The y position of the tile during motion |
x_destination |
The x position where the tile is moving towards |
y_destination |
The y position where the tile is moving towards |
sprite_index |
Of the tile, so we can draw it later |
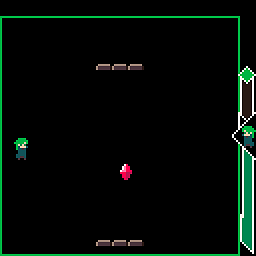
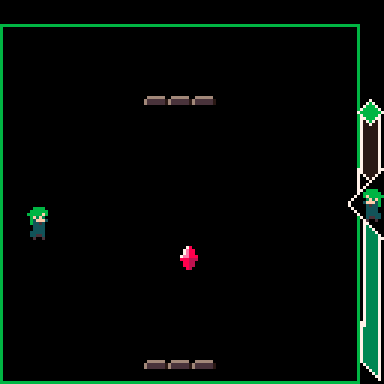
The ‘destination position’ variables should be set as the coordinates of their location in the map, as that’s where they’ll eventually end up. The ‘current position’ variables haven’t been covered yet, but when the player enters a room, tiles shoot in from every which direction, before slowly assembling in the correct formation. As such, we need an entry point for the tiles to come from (as well as an exit point to eventually despawn them).
Here’s the function I use to generate my start and end points.
function tile_endpoint()
    local angle = rnd"1"
		--return table with x and y
    return { 64+sin(angle)*100, 64+cos(angle)*100 }
end
As you can see, it picks a random number from 0 to 1 which we use as the angle of movement, takes the center of the room (64,64), and multiplies by 100 to make it a coordinates for outside of the room in said direction, and we return those coordinates as a table. By the way, that rnd"1" is a little trick you can use to avoid using parentheses and save a token.
Implementation
Now we just need a means to move the tile from these start coordinates to our eventual end destination. A simple lerp will easily allow us to implement this! (For an overview of a lerp, check out this article.)
Here’s a mockup of how you might implement it, where draw_state is the aforementioned array we inserted the tile data into.
function _draw()
    for tile in all(draw_state) do
        local dist =
            distance(tile.x_current,player.x,tile.y_current,player.y)/7

				tile.x_current += (tile.x_destination-tile.x_current)/dist
        tile.y_current += (tile.y_destination-tile.y_current)/dist

				spr(tile.sprite_index,tile.x_current,tile.y_current)
    end
end

function distance(x1,x2,y1,y2)
    return sqrt((x1 - x2)^2 + (y1 - y2)^2)
end
You’ll note that there’s something interesting going on with our lerp weight - I made it a factor of the distance between the tile’s current location and the player’s location. That’s my ‘special sauce’ so to speak, which adds the effect you can see in my example gif: the room slowly fills in from the player outwards.
Naturally, you can swap in any coordinates for the player to make the room fill in from any specific points - feel free to play around with the numbers to establish a unique effect that sets itself apart!
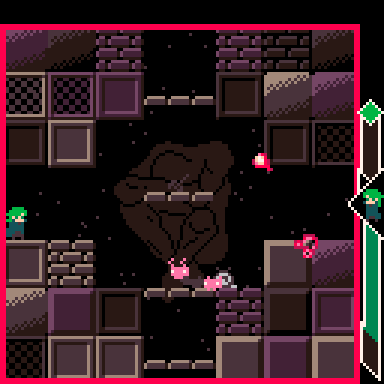
Making the tiles despawn as you exit a room is much the same - simply update the x and y destination variables with a new set of endpoints supplied by the tile_endpoint() function, and off they go! Remember to delete them when they leave the screen though, or else you’ll memory leak each time you move from one room to another!
Conclusion
And that’s a basic overview of how that effect is implemented. Oblivion Eve utilizes a more complex form of the above example, and similarly, you should also find ways to iterate upon it yourself to make it look even cooler and more suave! For instance, there’s no reason to delete all the tiles as you move from one room to another; you can check if some tiles are shared between the old and new rooms, and simply move them to their new positions.
Go out there and blow people’s minds with your slick animations!
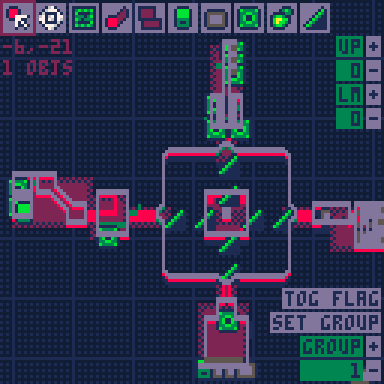
PICO-8 Custom Editors
by Werxzy
In most of my bigger PICO-8 games, I've been making custom editors to smooth out the process of adding and editing the game's content. The built-in editors, plus some code, are good enough to build most game worlds, however, sometimes there's just too much data to work with which would require editing strings of data way too much. Or maybe there's something that the built-in editors just don't do.
When working on your games, you should think about how your game's data is going to be organized and what tools are needed.
SokoCode
If what the game needs is simple enough, PICO-8's built-in editors are likely all you need. In Sokocode, all the levels are stored inside PICO-8's map data, and information about the levels is stored in the code.
The extra information held things like the coordinates of the level in the map data, the name of the level, and unlocking conditions. This was before I started making my own editors in PICO-8, but I didn't consider one necessary since it's pretty easy to update the information.
Slime's Light
With Slime's Light however, I needed to place objects with pixel positions instead of map positions and create links between them. That would be difficult to edit directly in code, but also required more than the built-in map editor could offer.
I still used PICO-8's map editor for the base shape of the levels though, as it already did most of the things I needed and was easier to work with. I ended up having the editor and the main game in the same file, allowing me to see how the game reacts to a few interactions.
I however stored the new map data inside a text file that was included in the code, but also exported using printh to save any changes made.
SB-1800
The PICO-8 map editor isn't always the right choice though.
In the middle of working on SB-1800. I realized that with the 3d space and the potentially large space I would work with, it would be pretty difficult to use any of PICO-8's editors to properly make the game world.
With a custom editor, I could place/move/edit walls, floors, robots, and other objects within the game world. Since I didn't want all the objects to be rendered at once, I created a system that limited only objects inside specific zones to be drawn.
The determining of what objects were drawn in a given zone was automatically calculated by the editor, though I could change it if something wasn't drawn correctly.
This also used the include/printh method that Slime's Light used, except the data exported for the final game was much more compact.
One extra detail: I didn't have any sort of "AND" logic for the pressure plates in the game.
So one of the final sequences required a single robot far away from anything else, standing on 4 moving platforms, each attached to different pressure plates. When all 4 pressure plates were pressed, all 4 platforms would be gone and the robot could fall down onto a 5th pressure plate, ensuring a specific event would happen.
My Current Projects
Then there are some game ideas where just 1 new editor isn't enough.
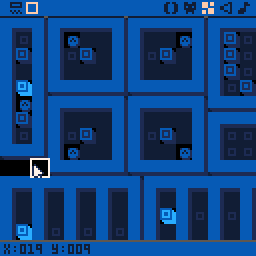
For the next two games (no official names for them yet), I made multiple editors to manage more than just map data. I also starting to use a special function _map_display() in order to double the window width of the editors. So that a single PICO-8 instance displays 2 screens wide.
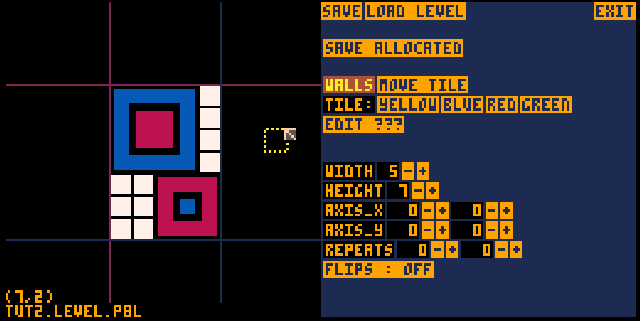
For the tile puzzle game, I created two editors that can quickly switch between each other. Above is a level editor and below is a world editor that helps connect levels together.
It would have been possible to stick with the built-in editors similar to Sokocode, but due to the large amount of levels planned, it would have been a pain to constantly adjust the level information.
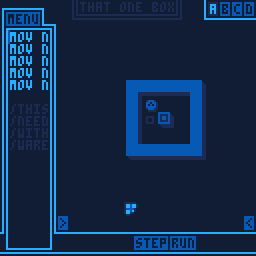
Then uhh, this isometric/3D action adventure game I was working on currently has 4 editors, with 2 more still being needed.
Sprite/Palette Editor
Animation Editor
Map Editor
Font Editor
I made a sprite/palette editor, animation editor, map editor, font editor, and then still to be made are actor and overworld editors. This doesn't include the custom scripting language and compression system I made for the game. I probably have gone too far with this one.
All I can say is, editors can be great, but don't fall into the insanity of too many editors with PICO-8, it's a lot of work just managing the data. What's important is actually reaching the point where you're making the game and seeing your changes in game.
While custom editors can assist greatly when making your game, with too many editors, you might find that you're working more on the editor than the actual game. But if you are planning long term, then making custom editors could be well worth it, especially if the editors can be reused in future projects.
- Werxzy
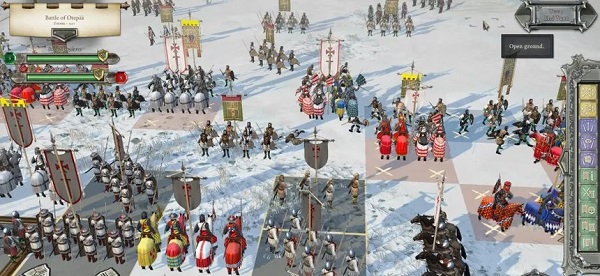
Orb of Aeternum:
a strategy game by Johan Peitz
We are grateful of Johan Peitz (who you might know from picoCAD, picoSYNTH, Hellgineers, and founder of Apskeppet Game Development Studio) for his generous support on Ko-fi which helps us create more content like this zine. He produces absolutely incredible PICO-8 tools and games every few months and I have been excitedly watching the development updates on thier latest game, Orb of Aeternum.
It is now available and I bought myself a copy so I could share my honest opinion.
Description
A captivating real-time strategy game where players assume the role of a dungeon master tasked with protecting the powerful Orb. You start by digging out an underground fortress of rooms and corridors to create your own strategic maze stretching outward from the Orb. To do this you spawn a variety of monsters to dig, build, and eventually defend against human invaders —the classic dungeon-diving adventurers that seek your treasure.
As you dig, you seek three resources: gold, scrolls, and runestones.
The gold is your main resource for spawning new minions and buying special room upgrades for your dungeon. The scrolls are the blueprints that unlock the room upgrades, which could strengthen your minions or provide new defensive options. Lastly, the runestones are your path to victory, as you need to collect 4 of them to fully protect the orb.
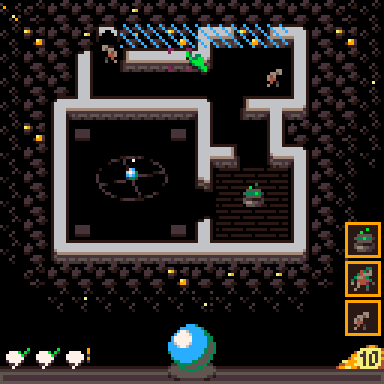
The resources are scattered differently every time you play and greatly influence the shape of your dungeon. So it quickly becomes a multi-faceted management of actions between digging for resources, designing your dungeon layout, building rooms to house upgrades, hiring the right balance of workers and warriors, laying traps, expanding outwards in search of runestones, and all while making sure those adventurers aren't able to reach the Orb!
Review
As a big fan of strategy games, this one does not disappoint at all. I am hooked because it is so open to many different strategies and techniques to joyfully trial-and-error my way through. Every failure causes me to eagerly assess my mistakes and come up with a new approach to try out immediately. The balance of difficulty and speed of the gameplay wipes away any feeling of grind. I am just as happy to start over from the beginning as I am managing a large fortress full of upgrades.
- Nerdy Teachers
Buy Orb of Aeternum:
Wargaming, a brief history
by KumaKhan22
Humanity has always needed an outlet from the brutal conditions of the real world, so games have always existed in some form or another; but when the weather was too harsh to allow for outdoor activity, it was inevitable that tabletop gaming would be born.
The original concept of wargaming traces its origins back to the game of chess, which was brought to the world around the 7th century by the Gupta dynasty (modern day India) who are also credited for the invention of another classic modern board game, Pachisi; this ancient form of Parcheesi would use a handful of seashells tossed to determine your moves, much like the dice or knucklebones that were rolled in other games of old.
Jump ahead to 1870 in the German state of Prussia: military officers, who would go on to win the Franco-Prussian War, learned realistic battle tactics through a tabletop game designed by a mathematician 100 years earlier.
The true “Father of Wargaming”, Professor Johann Christian Ludwig Hellwig, found success selling his game in 1780. Colored squares on a map would represent types of terrain and miniature pieces modeled after different units from actual armies could be moved in turns. The game expanded on Chess in many ways: terrain variety, orientation of troops, weapon range, defensive cover, and even a fog of war!
A player had to rely on information from scouts & spies to try and move into a position that grants their side the most advantage while not leaving themselves open for attack.
This original version of wargaming was so successful the Professor was able to publish a second edition of his rulebook, which is the first known revision of wargaming rules in history.
As the world turns, other well-known persons would find these wargames, some of whom enjoyed them so much they were inspired to customize the rules for their own home games. Famed author of Treasure Island and Dr. Jekyll and Mr. Hyde, Robert Louis Stevenson had taken to the idea of wargames so much that he was known to sketch full maps on the floor of his home.
Another esteemed author, H.G. Wells, also loved wargaming so much he wrote and released his own game, “Little Wars”, in the early 20th century as a ‘Floor Game’ (literally, a style of game played while sitting on the floor.) This failed to take off as the world economy made the price of materials necessary to play the game much more expensive.
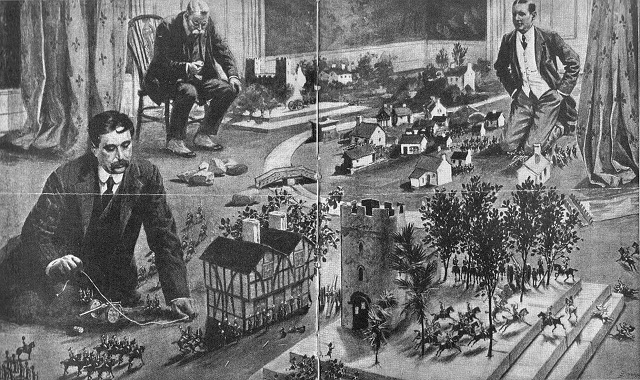
A big step towards organizing players of wargames was introduced by a man named Jack Scruby. He is credited with not only spearheading the first ever miniature wargaming convention in 1956, but then in 1957 published ‘The War Gamers Digest’ by himself. This was an effort to help wargamers around the country correspond and share their own rules. The next two decades would see an explosion of popularity in wargaming, including published books and companies that produced their own miniatures.
Would you have guessed that there were 200 years of miniature wargaming history before Gary Gygax is mentioned? In 1971, inspired by the wargames that were popular up until this point, Gygax would release his own version of wargaming titled ‘Chainmail’); this in turn would go on to be the foundation for a game that is still enjoyed by people from all walks of life today: Dungeons & Dragons.
When you think of wargaming in video games you think of Real-time Strategy or Turn-based Strategy games like Starcraft, Civilization, Populous, and Total War.
If you enjoy these types of games, then here are some great examples of strategy war games in PICO-8: Pico-Wars , Shadows of Dunwich , UnDUNE II , Age of Ants , Kingslayers.
I would love to see more tactics and strategy style war games in PICO-8 in the future, so I hope this article inspires more!
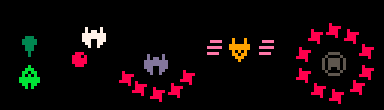
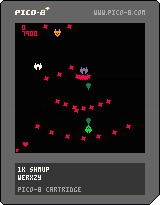
3K Shmup Day
by Achie, LokiStriker, Werxzy
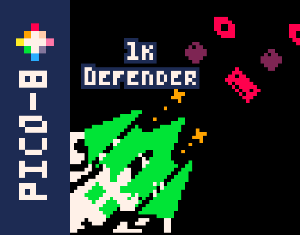
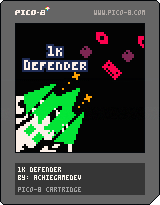
It all began with me browsing through my /carts directory, the eternal resting place of all kinds of abandoned projects. I stumbled upon an interesting title: 1kex.p8. That sounds like a perfect file to look into while procrastinating. The 1k Jam is an amazing coding exercise, where you have to fit everything into 1024 characters (back in my day). I had a really basic shmup project made for the 2021 jam, but sadly I could not fit into however hard I tried.
BUT the rules are different today, we are now working with compressed bytes, which is a slightly more forgiving restriction. I jumped back into the code, and finished it up with a little state loop, so we actually have a start and a lose condition, aaand didn't submit as it was not fully legal in my opinion, as I started it 2 years ago, not during the jam. With that out of the way, I was free of the shackles of the jam, so I gave it a little music, sfx, a cover, and published 1k Defender onto the world.
The code is nothing really exciting on my part, as I was just struggling to adapt my old habits into this new tight world. You can check the code here: https://www.lexaloffle.com/bbs/?tid=141220 while I ramble on about it.
The only smart thing I remember from it, is that bullets and stars are basically the same, they just differ in collision checking, this way I didn't have to make a whole new adder and cycle to update them. Otherwise it is a generic shmup code with a lot of aliases to cut down character count, and a few goto calls that are disguising themselves as an actual game loop.
If you are not familiar with goto, it takes a label name as a parameter, so goto gamestart and you have to have a ::gamestart:: in your code. Upon hitting the goto line, the game will ignore everything else and jump directly to ::gamestart::.
::_:: --label
... --game code to be looped
goto _ --loop back to label
These 1k games typically use this instead of a long function _update() end which is a shortcut already. And I think that is all that is interesting and unique about it, so I draw a little cover art, and bam, release.
I posted in the "Nerdy Teachers Lounge" (Discord Server), as I usually do, and it grabbed the attention of one of our star developers: LokiStriker. They quickly started a new project, onto which Werxzy, the resident "I'm gonna make a coding game inside a coding game" caught up to, so they also jumped in. I kid you not these awesome people blessed us with two other 1k shoot'em ups in the span of HOURS. They were amazing, cool, smart and full of tricks.
This is the saga of how the 3k Shmup day was born, and how we had token crunching, encoding wizarding, sprite magicianing afternoon so I thought, why not ask these archmages to break down their code for all of us! And this is how this article was born. Take it away pilots!
- Achie
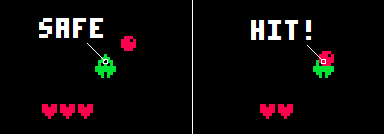
Lokistriker
I found myself at the Nerdy Teacher's Discord server where due to a conversation, Achie shared his 1K Defender Game. I find it very cool in concept and execution, and after some quick thought, I decided to give it a try. Since it was gonna be a very small game, and something I could finish in some hours (I think I totalled between 4-5 hours), I went right ahead and started developing my first 1K PICO-8 game.
Since this is a game about the code, I'll be focusing mostly on that:
Handling Input:

 x = mid( 4, x+( tonum(btn"1") - tonum(btn"0") ) *3, 124)

 y = mid( 4, y+( tonum(btn"3") - tonum(btn"2") ) *3, 124)
Collisions:
Since the code restrictions were so limiting, I decided to improvise a collision code instead of using what I usually do (which is Circle Collision).
if abs( enemy.x-bullet.x ) <= 8
and abs( enemy.y-bullet.y ) <= 6 then
  ...
end
Absolute distance between two points with padding. Basically Box Collision but defined by centerpoints instead of corners. Since all sprites are drawn from the center point, this system is plenty, if not ideal.
Character Stacking:
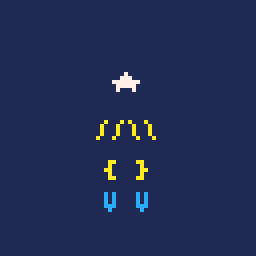
The rules of the 1K jam (which this game was following) state that all assets (graphics & sound) must be generated in the code. Following Achie's steps, I started with my characters being a star with slashes for wings.
But soon after, thinking about the rules, I thought that maybe stacking characters with different colors might be a way to make sprites while still staying within the ruleset.
Following this example, I did the same for the bullets and the enemies.
PICO-8 Juice:
I didn't know until this project that you can use the print (Shorthand "?") command to make PICO-8 do a sound effect through P8SCII Control Codes.
?"as2c03" --shoot enemy bulletsAlso, since I wanted to be as economical as possible, the cooldown of all actions is based on the global counter (a variable I made that increases one each frame). This controls the player and enemies' fire rate, and when the enemies spawn.
I used a bit operator to store numbers larger that 32768:
s += e.s >>> 16 --store the number

?tostr( s,0x2 ), 4, 4 --shorthand print the number
Since I had the space to afford it, I added DGET and DSET with cart data to store the highscore across runs of the program.
Shmup Juice:
I added some extra "particles" which are circles that spawn when you hit an enemy, giving feedback for when the enemy is getting damaged. Enemies stop shooting once they reach a certain point on the screen (the bottom 1/4th), since bullest from behind can feel bad.
The player flashes after getting hit, and is invunerable for a number of frames. The player also has a shot limit but the fire rate is quite high, which encourages getting close to the enemy.
Doing this single day jam-like game was very refreshing and invigorating, as when I finished it I started work on the current shmup I'm working on, a smaller one which I'll be releasing soon.
So I have to thank Achie for showing me his game, as it was in part the reason why I started working on this new "small" shmup.

![]()
Werxzy
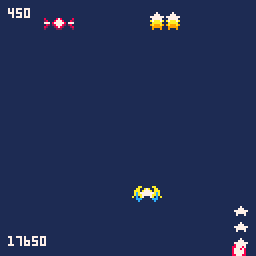
I initially got interested in the idea of making a 1k shmup while seeing LokiStriker share progress on his attempt. I was mostly into the idea of utilizing strings and lua’s unpack function to have a decent variety of enemies and bullet patterns and ended up with 5 of each.
The system I ultimately built allowed controlling the number of bullets in a pattern, the spread of the bullets, the speed, if the bullet would spawn moving towards the player, cooldown, the look of a bullet, the look of the ships, the starting velocity and acceleration of the ships, the health of the ships, the bullet type the ship used, and the point value for the ships.
Also, the data in the strings is ordered so that they can be used in print (Shorthand "?") without needing to be reordered.
o = split"ship,0,0,7,10,20" -- example ship or bullet data
-- 10 and 20 aren't printed they store info like health

o[5] -= 1 -- object loses health
o[3] += 4 -- move object down

?unpack(o) -- draws ship or bullet
Early on, I had all the bullets looking the same, but when I added a ship that zoomed past the player firing bullets horizontally, it looked too similar to all the other bullets. So I eventually made its bullets pink and used the Japanese character “ミ”.
I also noticed that the bullets always fired along the same Y position, making it easy to dodge just by staying between rows the bullet would appear. So I randomized all ships starting Y positions.
To try to keep the byte count low, the enemies, their bullets, and the player's bullets are all updated and rendered within the same loop. The current group's type is checked so that they get updates unique to them, such as enemies being checked if they are hit by the player's bullets.
While the collision of enemies with the player's bullets are just doing AABB collision checking, the player checks if it is hit by an enemy bullet or ship using pget at the center of the player's sprite.
I added a scoring system and 3 health points, similar to Loki’s, since I haven’t worked on a shmup before and that seemed like the right way to go.
I originally just used PICO-8 glyphs, but was able to give the ships more character by using a one-off character creator made by Sosasees for the sprites.
While I wanted to add a second layer of color to give the ships more depth, it ended up taking too many bytes. Though I think LokiStriker's ships ended up looking better. For audio, I also used PICO-8’s control codes to add sound effects for the player firing and a ship getting hit or destroyed.
In order to reduce the byte count a bit, I shifted some code around to bring strings of characters that repeated closer together to ensure PICO-8’s compression algorithm picks up on it. I used Shrinko-8 to compress the final version into 1023 bytes.
- Werxzy
![]()
Picotron 0.1
The Fantasy Workstation
I cannot count how many times I've seen people ask for, talk about, and even mockup a next-gen PICO-8 over the years. Would it be PICO-16 or maybe PICO-32?? Well zep has been working on answering that prayer and it turns out it's PICO-64! Well, sort of, it's...

New Years Eve 2023, we were all surprised with the release of Picotron 0.0 (dubbed "Picotron Playground") which was our very first hands-on experience with PICO-8's younger but much bigger brother. It is still available for free but has its limitations and is only browser based.
With that precedent set, PICO-8 enthusiasts huddled together in our online communal livingrooms like kids awaiting Santa Claus to bring us presents, but instead of Santa, it was Zep we waited for and it was now New Years 2024. Alas, the day came and went and we sadly did not receive another surprise gift. However, we tempered our disappointment with empathy and understanding for all the hard work Zep puts into our beloved Lexaloffle digital toys. After all, our "Santa" doesn't have a workshop of elves helping out.
So we held out hope and gazed longingly at the horizon, knowing it would come soon enough. And word did come the very next day, with a release date set for 14 March as a special treat for all of us nerds. (March 14th is Pi Day because... 3.14 ...but you already knew that, you math nerd you!)

True to his word and deadline, Zep delivered! While our Pi Day pies were baking, we hurried to empty our wallets and take advantage of the release day sale or at least we window shopped on the sale page, planning our budget for a future purchase.
Now, as much as I want to, I'm not going to dive in and start making tutorials and resources for Picotron. No, there is still far too much I still want to do with PICO-8. I did buy Picotron, but for now, it is for the alpha testers, the brave explorers helping to discover and report bugs, issues, and propose improvements and features in these early versions, shaping what Picotron will grow into.
If you missed out on the early days of PICO-8, then getting in on Picotron now will be a fun time full of wonder and amazement as everything is new. Just know that it is in Alpha and many changes are expected until it has reached a more stable version.
Most of the Picotron discussions in the PICO-8 Discord have already migrated over to the new dedicated Picotron Discord Server, which I wholly support because it is quite a different beast and deserves its own space.
Sorry if you were expecting more here. We simply wanted to acknowledge the milestone of the Alpha Release in this zine and explain why we weren't immediately expanding our content to include Picotron tutorials...yet. However, if someone would like to be the ambassador and liason for Pico-View in the Picotron space, then get in touch with us and our next issue of Pico-View may have a Picotron section with news and updates.
Pixel Art Gallery
Artist Spotlight: Retronator
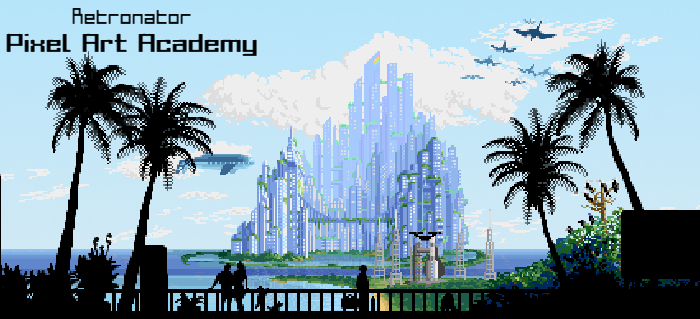
For the cover art of this issue, I reached out to an incredible artist that I have been following since last year. Not only do they create pixel art but they are working on a game that teaches pixel art!
Pixel Art Academy is an educational game for learning how to draw. It begins as a classic point-and-click style game that feels like you are role-playing as an art student enrolling in a beautiful campus. Even the website has a text-based adventure game to introduce you to the world.
In the Learn Mode Demo (Available on Steam), you jump straight into the game's interactive tutorials. After you learn how to use the basic drawing tools, you put theory into practice by first copying an existing pixel art sprite. When you've shown you got the hang of the tools, you get to create your own art by drawing sprites for a snake game—and then play your creation!
What is extra interesting for all of us here is that PICO-8 is integrated into this game! Not only that, but you are able to update the sprite assets of the cart live, and then play your changes immediately on the digital PICO-8 handheld, all without leaving Pixel Art Academy.
It is a beautifully immersive environment with sprawling pixel art scenes. It feels otherworldly and dreamlike with its layers of metafictional reality. For you are in reality a student learning pixel art by playing a pixel art game where you play as a student learning pixel art by drawing pixel art in a pixel art world, and even play games within the game! It's fantastic!
This is also a wonderful example of educational software done right. It is open source, able to include many familiar and beloved character designs with fair use, and zep himself gave permission to include the use of an early version of PICO-8.
There is so much planned for this enormous project, and I encourage the PICO-8 community to support it however you can and maybe even find ways to collaborate!
- Nerdy Teachers
Follow Retronator, wishlist on Steam, download the demo, leave a recommendation, and share posts on social media to help spread the word of this amazing artist, educator, and game developer.
Closing Remarks
Thank you for reading the 2024 Quarter 1 issue of the Pico-View web-zine! We hope you enjoyed all of the articles this month. Here are the folks who helped piece the zine together one pixel at a time...
-Retronator- Cover Art
-Packbat - Author
-Bikibird - Author
-Luchak - Author
-Jack Raymond (Gravitoid) - Author
-SmartAlloc - Author
-Werxzy - Author
-KumaKhan22 - Author
-LokiStriker - Author
-Achie - Game Reviewer, Author, and Coordinator
-NerdyTeachers - Editor, Author, and Illustrator
Thanks to all the authors, contributors, and readers for supporting our PICO-8 zine! If anyone would like to write an article, share pixel art, contact us @NerdyTeachers on twitter or on our Discord.
-Nerdy Teachers
20584
29 Mar 2024