PICO-8
Nerdy
Collision
collision:
Boundary
One of the simplest forms of collision detection is creating a boundary. You check if something is about to move past a certain point on the X axis and/or Y axis and prevent movement beyond that edge, creating a boundary.
No Collision
PICO-8 Collision Function
function boundary_collision(obj, min_x, min_y, max_x, max_y)
	obj.x, obj.y = mid(min_x,obj.x,max_x), mid(min_y,obj.y,max_y)
endPreparing an Object
First, we need an easy way to store the position and other data for a player or other game object that is moving in your game. We can do that with a table that stores at least X and Y variables. The above function expects to get an object table and 4 numbers that will serve as the rectangular edges of the boundary.
The player or any game object, could be created like this:
--create object table
obj = { x=10, y=20 }
To get the values out of that table, we use obj.x (See Table Shorthand).
--get values out of object table
print( obj.x )   --prints 10
Creating a Boundary
The simplest and most common boundary that you might use in your game is keeping objects on the screen. The edges of the screen become the bounds that you don't want to allow movement outside of.
The PICO-8 screen is 128x128 pixels, starting at 0 on the left edge and ending at 127 on the right edge. The same goes for the top (0) and bottom (127).
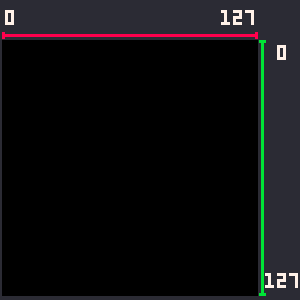
You could name these boundary edges whatever make the most sense to you which could be for example "left, right, top, bottom" or as minimum and maximums on the axes, "min_x, max_x, min_y, max_y".
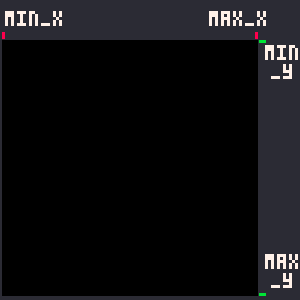
| side | variable | screen |
|---|---|---|
| left | min_x | 0 |
| right | max_x | 127 |
| top | min_y | 0 |
| bottom | max_y | 127 |
To keep your game object inside of the boundary, first think of it one side at a time. So considering the left side ( the minimum on the X-axis ), you just want to check if the object is to the right of the left side. Since left on the x-axis are lower numbers, we could simply check if the game object's X is more than the left edge ( min_x ):
if obj.x > min_x then
	--allow movement
end
Checking if the object is within the bounds like this can be combined with button input checks so that even if a player presses left, the movement code will not run if the player is at the boundary, which will look like the player hit a boundary wall.
if btn(0) and obj.x>min_x then
	obj.x-=1 --move left
end
Or you could do the opposite (check if object is outside of boundary) and reset the object's position to the boundary limit:
if obj.x < min_x then
	obj.x = min_x
end
The above code will check if the object is moving to the left of the left edge, and if true, then the object X will just get set back to the left edge of the boundary. The player could press the left button as much as they want, and every time the player tries to move past the boundary, it just gets reset to the boundary edge. In the game, this would happen before the character is drawn, so to the player, it simply looks like the character hit a wall.
Now let's do the same for both the left and right sides of the screen.

if obj.x < min_x then
	obj.x = min_x
elseif obj.x > max_x then
	obj.x = max_x
end
Just change all of those X's to Y's and you create vertical edges to the boundary. This is the basic idea of how to create a boundary and keep a game object within that boundary.
Understanding an Expanded Version
We can continue the logic of checking each edge and keeping the object within all four sides of a rectangular boundary like this:
function boundary_collision(obj,min_x,max_x,min_y,max_y)
  if obj.x < min_x then
	  obj.x = min_x
  elseif obj.x > max_x then
	  obj.x = max_x
  elseif obj.y < min_y then
	  obj.y = min_y
  elseif obj.y > max_y then
	  obj.y = max_y
  end
end
This function has parameters ( obj, min_x, max_x, min_y, max_y ) and it is expecting the obj to be a table and the rest to be numbers that will be compared to the object's X and Y position.
Why No Return?
After checking all 4 sides of the boundary, we just set the object's X and Y, without returning anything because the global table that is passed to this function will be updated even within this function, and even as the table becomes a local variable named obj.
For example, if we pass this function a player object table, the original player table will be updated even though it will be referenced as a local variable named obj from inside the function. This is because tables in Lua are passed by reference, as stated here in the Lua manual:
player = { x=30, y=40 }

boundary_collision( player, 0, 0, 127, 127 )

--player table is updated by boundary function
Understanding the Simplified Version
We can simplify and condense the expanded version down to just one line:
function boundary_collision(obj, min_x, min_y, max_x, max_y)
	obj.x, obj.y = mid(min_x,obj.x,max_x), mid(min_y,obj.y,max_y)
end
This works the exact same way as the expanded version because all the steps of comparing the object's X and Y with all four edges of the boundary (X and Y minimums and maximums), and then setting the object's X and Y to those edges if it goes beyond them, all happen in this one line.
The first way we condensed the code is what is called multiple assignments. Where we assign more than one value to more than one variable on a single line. That way we assign obj.x and obj.y together on the first line of the function, separated by commas.
obj.x, obj.y = value1, value2 The second trick to condense it is to use a very handy PICO-8 function named mid() which returns the middle of 3 numbers.
mid( 12, 104, 60 ) --returns 60We can use this one function to compare the object's X with both left and right edges of the boundary we set, and then the object's Y with both edges of the top and bottom edges. Since it returns whichever value is in the middle of the 3 compared, we will get the edge's value whenever the object tries to move beyond it. Then we can simply set whatever is returned to the object's X and Y, which would stay the same values as they were as long as the object is within the boundary.
We can expand it to 2 lines to make it easier to read:
	obj.x = mid( min_x, obj.x, max_x )
	obj.y = mid( min_y, obj.y, max_y )
Boundary Collision can be used in a variety of ways and often used with other forms of collision. You don't always need a full rectangular boundary, you might only use a single side, or separate out each side to do something different, not just keep the player within the boundary.
One classic game that kept you within a boundary on a single screen was Bubble Bobble. Notice that the boundary (in red) is not at the screen edges, but shrunk to within the smaller game play area with the gray bricks creating a frame outside of the play boundary. This is a perfect case to use our boundary function at the top of this page.
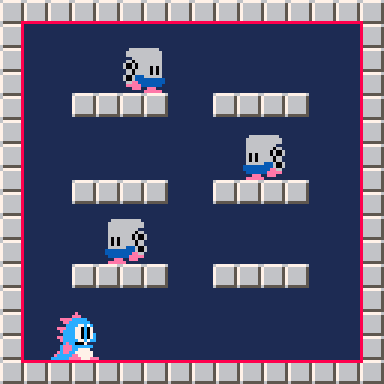
--init
player = { x=20, y=110 }

--update
boundary_collision( player, 8, 8, 120, 120 )
Note: You would also take the height and width of the sprites into consideration.
Some games such as Super Mario Bros 3, have levels where you must outrun a constantly moving screen edge such as this airship level with the left side being an invisible force that kills you if you fall too far behind. Sometimes it is a jumping game with water or lava rising from the bottom, or a wall of spikes or fire closing in on you. Instead of trying to create complicated collision detection for a hazard like that, you could simplify it to a single boundary edge that could be fixed to the side of the screen, or slowly advancing towards the player.
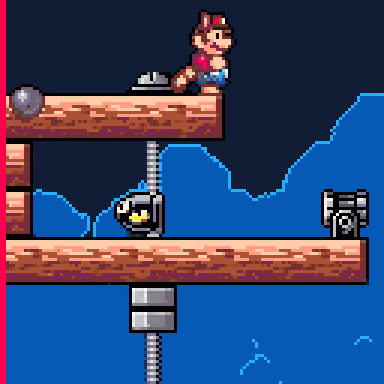
--init
player = { x=64, y=64 }
min_x = 0
--update
if player.x < min_x then
--player dies
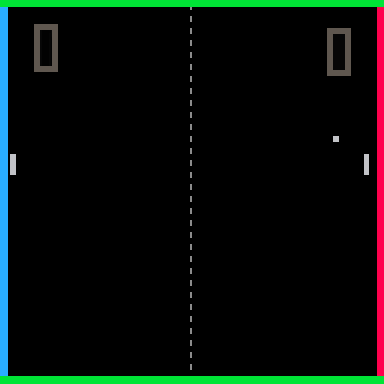
endIn Pong, you could have the screen as the boundary where the ball collides with the top and bottom sides, but the left and right sides trigger the opposite player to gain a point and reset the game. In this case, you would want to separate the sides of the boundary collision to trigger different reactions to the ball trying to cross the specific side.
--init
ball = { x=64, y=64 }

min_x = 0   --player goal
max_x = 127 --computer goal

min_y = 0   --top wall
max_y = 127 --bottom wall

--update
if ball.x < min_x then  --left
	--computer scores
end
if ball.x > max_x then  --right
	--player scores
end

if ball.y < min_y        --top
or ball.y > max_y then   --bottom
	--bounce ball off wall
end
4987
24 Apr 2025